Olive & Lemon Fazzoletti (Handkerchief Pasta)

Hear me out. Have you ever craved a food that evokes the feeling of a place?

Nothing compares, in my opinion, to pillowy, perfectly cooked fresh tagliatelle… or better yet, fazzoletti.

These squares of fresh pasta turn into blankets of flavor, carrying delicious ingredients into your mouth like a magic carpet.

And perhaps this pasta shape is not for everyone, but for me, in these early days of a so-far rainy summer, I’ve spent my nights laying in bed envisioning myself on the Italian seaside in Luguria - the place where the dish was born.

This dish quells my longing for the feeling of the sun. The bright flavors, warm air & sea-salty wine of the Italian Riviera.

Pre-made, fast cooking fresh lasagna sheets bring this meal together quickly, while still maintaining the feel of restaurant quality. It has BIG flavor (like most of my recipes), and the combination of briney olives & lemon zest bring you straight to the Italian seaside. At least I hope so. Buon’appetito!


Olive & Lemon Fazzoletti (Handkerchief Pasta)

Serves 2-3

  • 6 Rana Lasagne Sheets, 1 package

  • 1 pint container Sungold or orange cherry tomatoes

  • 3-4 finely minced garlic cloves

  • 1/2 cup pitted Italian green olives, preferably Sicilian-style like Castelvetrano

  • 1.5 Tbsp butter

  • 1 whole lemon, washed well for zesting

  • 3 Tbsps fresh ricotta

  • 1.5 Tbsps crushed, diced shelled pistachios

  • Extra virgin olive oil

  • Coarse kosher salt

  • OPTIONAL: red chili flakes for heat

Start a large pot with 2.5 Qt of water to boil, adding 2 Tbsp of salt so that water tastes noticeably salty.

Cut all 6 of the lasagna sheets from the package in half and set aside.

Start by prepping all of your ingredients: finely mince 3-4 garlic cloves. Rinse the entire pint of cherry tomatoes & cut into quarters. Loosely mince olives, until you have about 1/2 cup loosely packed. Loosely chop a handful of shelled pistachios.

To a large flat-bottomed sauté pan, add a big glug of olive oil and place over medium heat. After a minute, add the minced garlic, cooking up to two minutes, until garlic is very fragrant.

Next add all of the cherry tomatoes, cooking down 5-8 minutes until jammy, lowering the heat as needed so as not to burn the garlic.

Finally, add the minced olives and red chili flakes if you want them. Stir to combine. Lower the heat while you prepare the pasta.

Carefully add your half lasagna sheets to the boiling water. Occasionally push the sheets down into the water as they cook because they will want to float to the surface. Let boil about 5-8 minutes or until cooked through (you can cut off a small corner of a sheet to taste).

While the pasta cooks, add three pats of butter, about 1.5 Tbsp, to the pan with the olive & tomato mixture. Add two to three small ladles full of pasta water (don’t add too much liquid!). Stir to combine, creating a silky emulsified sauce.

Taste and salt to taste if needed, but the olives should bring most of the salt and brine.

When the pasta sheets are ready, drop them directly into the pan with the sauce, carefully tossing so as not to break them. If they rip a little, that’s totally okay.

Plate the noodles, spooning extra of the tomato & olive sauce on top. Finish each plate of pasta with a heaping scoop of ricotta, the crushed pistachios and plenty of lemon zest.

Roasted Squash Burrata Sandwich w. Pickled Shallots & Calabrian Chilis

This is the kind of sandwich you never forget…

One of those meals that stays with you long after you’ve taken the last bite. As you clean crumbs from the corners of your mouth, the sweet sting of Calabrian chilis reverberates and the umami acid of pickled shallots lingers. This sandwich is a flavor orchestra you’ll want to revisit again & again.

I won’t be shy in laying it out for you — this warm sandwich is the perfect messy meal for a day spent at home on a blustery winter day, alone or in the company of someone who won’t judge you for licking creamy burrata from your fingers with reckless abandon. Turned on yet? You should be.

P.S. Can you tell I’m writing this in the saucy, sexy spirit of Valentine’s Day?


Roasted Squash Burrata Sandwich with Pickled Shallots and Calabrian Chilis

1 SANDWICH

  • 2 slices of good sourdough

  • 1 small-medium Robin’s Koginut squash or Butternut squash (squash can be roasted 2-3 days ahead)

  • 1 ball of fresh burrata

  • 1 small-medium shallot

  • 1-2 whole Calabrian chilis, or 1-2 Tbsps Calabrian chili spread

  • Fresh or dried oregano

  • Garlic powder

  • 4 oz white vinegar

  • 2 oz Rice vinegar, apple cider vinegar, white balsamic or white wine vinegar

  • Coarse kosher salt

  • 1 Tbsp. Sugar, any kind

  • Extra virgin olive oil

  • Freshly ground black pepper

  • Balsamic vinegar

Note: Both squash and pickled shallots can be made 2-3 days ahead of time, cutting sandwich prep time in half.

Preheat oven to 400F. Cut your squash into 4 quarters and remove seeds. Drizzle inner flesh side of each piece with olive oil and rub to coat evenly. Sprinkle with fresh or dried oregano, freshly ground black pepper, salt and garlic powder. Don’t be afraid to eyeball your seasoning! Place skin side down on a baking sheet and into the oven for 20 mins.

Before preparing sandwiches, remove burrata from the fridge to come to room temperature while you prepare the other ingredients, and same for the squash if you have pre-roasted it.

In the meantime, pickle your shallots: in a 12 oz jar, add 4 oz of white vinegar and 2 oz of another milder, sweet vinegar like, apple cider, rice, white balsamic or white wine vinegar. Add 1 Tbsp of any kind of sugar and 1 Tbsp of salt. Put a lid on the jar and shake until salt and sugar have disappeared into the vinegar. Using a sharp knife, cut off both the top and bottom of the shallot, then cut in half lengthwise. From there slice the shallot thinly into half rounds, like this. Add half rounds to the jar with vinegar. Press shallots down into the jar, packing tightly. If shallots are not completely covered by the liquid, top with a little extra mild vinegar until covered. Pickled shallots will last stored in the fridge up to a week, or more.

After 20 mins, you will want to check that your squash is cooking evenly, then roast for another 15-20 minutes, until flesh is fork tender. When your squash is finished roasting, place to the side to cool.

If you are using whole Calabrian chiles, cut two chilies into thin rounds. Remove fresh burrata from it’s liquid and gently cut into quarters, being mindful not to let the inner stracciatella and cheese drip out. Finally, remove skin from the cooled squash, either before storing or before making sandwiches.

Prep the bread: drizzle both sides of two slices with olive oil. Then place into a warm pan, and leave 2-5 minutes per side without disturbing, until brown and golden. If you are using a stainless pan, add a splash of olive oil to the warm pan first, then add bread.

When bread is ready, it’s time to build the sandwich:

First, place down Calabrian chili spread, if you’re using that. Then place down your squash, pressing it lightly into the bread. To each side, add a few pickled shallots. Next, your quarters of burrata. Finally, if using whole Calabrian chilis, add those on top. To the inside of the creamy burrata, add a splash of your best quality olive oil, a sprinkle of salt, fresh ground black pepper, and finish with a drizzle of good balsamic vinegar. Enjoy open faced, or close your sandwich and cut in half.

Tacos w. Slow Roasted Cod in Avocado Tomatillo Salsa

This hobby led to my favorite meal of the moment…

At the bookstore I’m that person idling with 10 cookbooks at my feet, slowly flipping through one at a time. I’ll never take any of them home with me, but I like to grab flickers of flavor inspiration & soak up inventive ingredient combinations.

So, recently at the McNally Jackson Bookstore in Williamsburg I was flipping through Molly Baz’s Cook This Book when something caught my eye: a crunchy tostada, tender fish, a vibrant green salsa-ish. And I knew I had to make my own. That night these tacos were born and I simply cannot get enough of them. Don’t let the recipe intimidate you: it’s just a bit of easy prep work you can totally handle while sipping your favorite drink & chatting with a friend. The fish cooks in 15 minutes and then you’ll be happily feasting on these bright, spicy & creamy tacos that will (hopefully) blow your mind.


Tacos with Slow Roasted Cod in Avocado Tomatillo Salsa

Serves 2-3

  • 6 Tortillas, I strongly recommend Trader Joe’s Corn and Wheat Tortillas

  • Hot sauce, I like it with Trader Joe’s Habanero Hot Sauce

For Fish

  • 2-3 filets of fresh cod, 3/4 lb total

  • 3 garlic cloves, grated or very finely minced

  • 1.5 Tbsps Extra virgin olive oil

  • Approx. 1 tsp Coarse kosher salt

For Avocado Tomatillo Salsa

  • 1 medium - large avocado

  • 3-4 limes (sometimes they don’t render much juice so I like to buy extra)

  • 3 small-medium tomatillos

  • 1 small bunch cilantro (here’s what to do with leftover cilantro)

  • 2 large garlic cloves

For Quick Pickled Veg

  • 1/2 cup white vinegar

  • 1/4-1/2 cup sweet vinegar, like white balsamic or sherry vinegar (rice vinegar, white wine vinegar or ACV also work)

  • 1/2 tsp coarse salt

  • 1/2 tsp sugar (any kind will work)

  • 1-2 small Persian cucumbers, cleaned and cut into thin rounds

  • 1 small red onion, thinly sliced into half moons

  • 1 red thai chili, with seeds if you want it hotter, or use a __ if you don’t like hot pepper

Chipotle Mayo Drizzle

  • 2 Tbsps mayonnaise

  • 1 small can chipotle en adobo, usually in the International aisle of your grocery store (stored in a sealed jar, this lasts in your fridge a long time and is a powerful flavor addition for marinades, dressings, mayos and dips)

Turn your oven on to 300 F.

Take 3/4 lb cod out of the fridge to bring to room temp. Leave it somewhere cool in your kitchen, not cold but not hot.

In the meanwhile, let’s make our quick pickle. to a large jar add about 1/2 cup white vinegar and then fill the jar to the 3/4 mark with another sweeter variety of vinegar like white balsamic or sherry vinegar. If you have neither, rice vinegar, white wine vinegar or apple cider vinegar will do. Pour all of your liquid into a small bowl.

To the vinegar in the bowl add 1/2 tsp salt and 1/2 tsp sugar. Stir well until dissolved into the vinegar (you can also do this in a small saucepan over low heat if you want to speed up the dissolving process).

In the meantime, to the empty jar add:

  • 1-2 Persian or mini hothouse cucumbers, cut into thin rounds

  • 1 small or 1/2 medium red onion, thinly sliced into half moons

  • 1 red thai chili, with seeds if you want it hotter, or use a __ if you don’t like hot pepper

Finally, pour your vinegar into the jar over the vegetables. If you heated the vinegar, allow it to cool before adding back to your jar.

Now, to make the avocado tomatillo salsa - the magic behind this recipe. Lightly oil a stainless steel pan, cast iron pan or cast iron griddle with a neutral oil (avocado, sunflower, safflower, canola, etc). Place over medium heat. Cut three tomatillos in half and two garlic cloves in half, and lay flat side down in your pan. It should be sizzling. Sear until browned, then flip and sear another few minutes on the other side. We’re looking to get browning on the garlic and a little char on the tomatillos (they may soften and that’s totally okay). When sufficiently charred remove from the pan carefully using tongs, set aside and turn off the pan. 

Get out a blender or food processor. To the bowl of the blender add large handful of cilantro with stems, half your avocado, juice of 1-2 limes (you can always add more later), and finally the charred tomatillos and garlic. Blend until smooth and then add a pinch or two of salt, tasting until it hits the sweet spot. This salsa should be citrusy and bright, so if you only used one lime consider adding another. Add to a jar and set aside.

It’s time to cook your fish: place your fish filets in an oven safe skillet or baking dish. Drizzle with 1.5 Tbsps olive oil, 1 tsp of coarse kosher salt (use less if you have fine salt), and 3 very finely minced or grated garlic cloves. Rub the filets with the salt, garlic and olive oil so they are evenly coated. 

Place in the oven and roast for 12-20 minutes, depending on the size of your fish filets. You want it to be flaky and tender, so try to avoid overcooking. If smaller filets finish first, transfer them to a plate and place on a plate tented with aluminum foil. When all of the fish is done, transfer it onto the plate.

While the fish cooks, your final steps to prepare:

  • This is optional but really makes the dish spectacular so I recommend it. In a small ramekin or bowl, add 1 tsp chipotle en adobo with 2 Tbsp mayonnaise and juice of 1/2 a lime. Mix until combined. You could also use a pre-made chipotle mayo but homemade is way better.

  • Warm your tortillas: you can do this in the microwave with this trick, but I like to warm mine over the small to medium burner on my stovetop carefully using tongs. Keep the flame low but not so low that it doesn’t reach the tortilla. It may need 30 seconds - 1 minute on each side. Look for a little charring and that it’s warm. Transfer to a plate as you warm the tortillas and cover with a clean kitchen towel or foil.

  • Take the other 1/2 of the avocado leftover from making the salsa, peel the skin off the outside, lay flat side down and dice. Add to a bowl to serve with the tacos.

It’s time to serve. Uncover the covered fish and using a fork, gently flake it apart into small pieces. Drizzle with plenty of your avocado tomatillo salsa. Then build your tacos - a little fish, a drizzle of chipotle mayo, some avocado and pickled veggies. Enjoy this flavor train!

Cardamom & Hazelnut Banana Bread

Thank you, Kristen Miglore

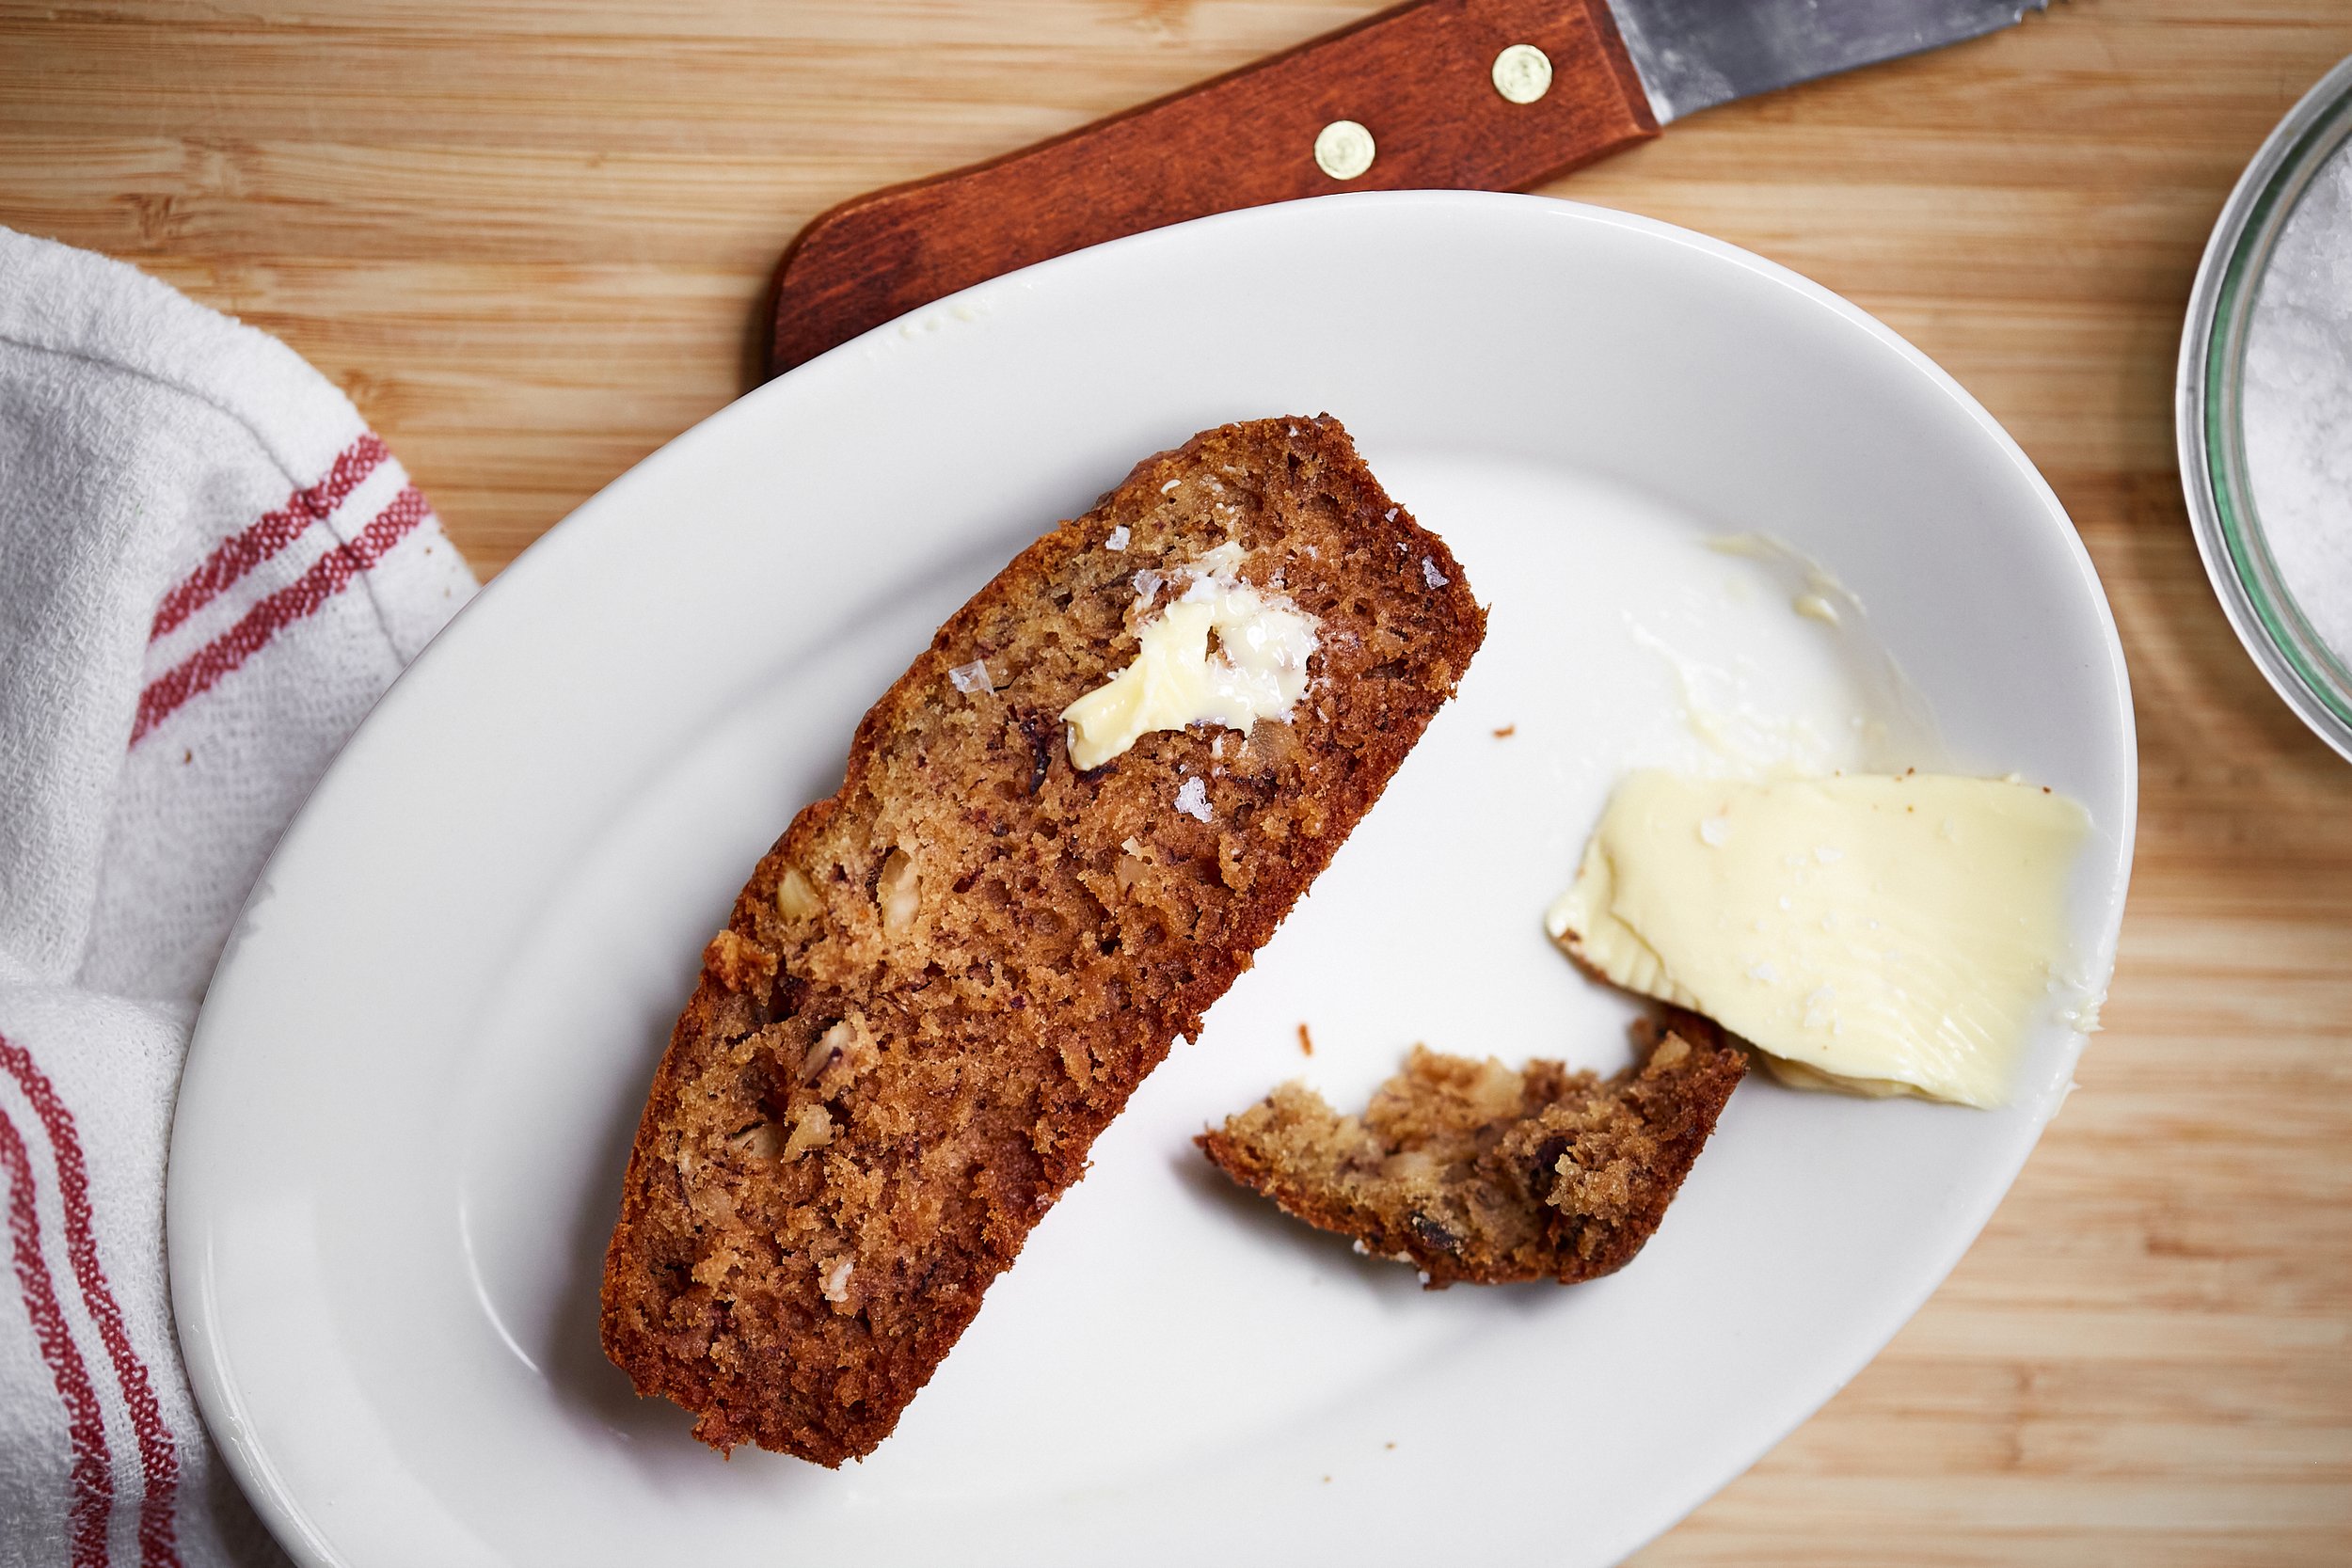
Kristen is a founding editor at Food52. She is also the share-er of my favorite banana bread recipe - a recipe her mom discovered in a community cookbook. As the best recipes are, it seems this one is meant to be passed on and tweaked in all the amazing ways banana bread can be, with a change of nut here, and a dash of something unexpected here.

In this version of Kristen’s banana bread I use hazelnuts and a hint of ground cardamom to make a banana bread that’s just extra-extra special in all the right ways. Of course I hope you will try this recipe, as well as Kristen’s OG version here, which is an undeniably good classic. I’ve also made this using Bob’s Red Mill Gluten Free AP Flour and it came out GREAT.


Cardamom & Hazelnut Banana Bread

Makes one 9”x5” loaf

  • 1/2 cup (226 grams) unsalted butter, melted, plus more for buttering the pans

  • 3 very ripe large bananas (frozen and thawed work great)

  • .87 cups (175 grams) granulated sugar

  • 2 large eggs

  • 1 1/4 cups (157.50 grams) all-purpose flour, or Gluten Free Baking Flour

  • 1/2 teaspoon fine sea salt

  • 1 teaspoon baking soda

  • 1/2 cup (113 grams) finely chopped hazelnuts

  • 1/4-1/2 tsp ground cardamom, depending how much cardamom you want to come through

  • Turbinado or other sugar for sprinkling on top (optional)

Preheat your oven to 350F.

Mash your ripe bananas in a medium sized bowl using a large fork. Once mashed add butter, sugar and eggs. Mix until well-combined.

In another medium sized bowl add your dry ingredients: flour, salt, ground cardamom and baking soda. In lieu of sifting, whisk all the dry ingredients together to make sure there are no lumps, and that they are thoroughly combined.

Add dry ingredients to the bowl with the wet banana mixture. Stir until the flour is nearly all the way combined with the wet ingredients.n Add your chopped hazelnuts and finish stirring until no flour is visible, making sure to scrape down bottom and sides of the bowl.

Butter the sides and bottom of a 9”x5” inch loaf pan. Before putting in the oven, add this special, but optional, touch that I love from Kristen’s recipe - sprinkle the top with a thin layer of turbinado or other raw sugar.

Bake for about 35-45 minutes, until a cake tester, paring knife or toothpick can be inserted into the center and come out with no visibly wet batter (as Kristen says moist crumbs clinging are okay. If you use a shallower pan, bake for less time.

Once removed from the oven, let the loaf cool, 15-30 minutes, then unmold and wrap tightly in parchment and then a layer of tin foil or beeswax food wrap. Keep covered at room temperature.

Tangy Carrot Salsa

Fight the battle against carrots that are shriveling in your fridge once & for all…

In my series ‘What To Do With the Leftover Sh*t In My Fridge’ I find easy culinary solutions for the pesky ingredients that somehow always find their way to the bottom (or back) of your fridge, only to see the day of light again once they’re past their prime.

This time around, the focus of my efforts was carrots and it took some time before I landed on the thing to save them from imminent death: carrot salsa. You didn’t misunderstand me - this 4 ingredient condiment is the thing you’ll be putting on your fish tacos & salads all summer long.


Tangy Carrot Salsa

  • 1 cup of thin carrot rounds from clean, peeled carrots

  • 1/4 cup diced red onion, large dice

  • 1/2 cup loosely packed cilantro, leaves and stems

  • 3 Tbsps of fresh lime juice, from 2-3 limes

  • Kosher salt

  • OPTIONAL: rounds of hot pepper of choice (jalapeńo, habanero, birds eye chili), Cubed avocado

If you are using carrots that have been lying around in your fridge for a while, you’ll want to revive them first by soaking them for a few minutes in an ice bath comprised of ice and water. This will give them back a bit of the moisture they lost while sitting in your fridge.
Clean and peel the carrots, and then cut into thin rounds (roughly 1/4-1/2 inch thick). A mandolin helps make quick work of this, but if you don’t have one, don’t fret — cut them by hand and don’t worry so much about your knife skills. This is a rough chopped salsa, after all. Do a large dice on a bit of red onion, about 1/4 cup. Finally, if you want a spicy salsa, cut a few rounds of your hot pepper of choice.

In the bowl of a food processor combine all ingredients with your squeezed lime juice. Pulse for about 15-30 seconds, just until you’ve created a rough chop. Don’t go too long or you will puree the mixture!

Empty into a bowl and season, adding a pinch of kosher salt and more lime if you like. You could even add some cubed avocado to this salsa before serving to give it texture and flavor contrast.

Enjoy with any meal you’d normally add salsa to (tacos, nachos, quesadillas, salads, grain bowls, toast, eggs!).


The Easiest Creamy Pinto Beans (Vegan)

Creamy, soft pinto beans are one of my favorite comfort foods…

This is how I make mine using nothing more than a can of beans and two cloves of garlic. They’re amazing on tacos, in my Shiitake Mushroom Burritos or just served as a side with some savory rice.


The Easiest Creamy Pinto Beans (Vegan)

  • 1 can Pinto Beans (I love Brad’s Organic beans)

  • 2 whole cloves fresh garlic, peeled and crushed 

  • 1 Tbsp extra virgin olive oil

  • Pinch kosher salt

To a pot add the entire can of pinto beans, unstrained. Add your 2 peeled & crushed garlic cloves, pinch of salt and extra virgin olive oil.

Bring to a boil. Then lower to a simmer and let cook until some of the excess liquid has cooked off, 15-20 minutes. Stir occasionally to make sure the beans are not burning on the bottom.

Once the liquid has reduced, remove the garlic cloves and use a large spoon or spatula to crush and break up the pinto beans. This helps them to get even more creamy. Continue to cook over a lower heat if you want them even thicker. When they are done cooking, add fresh cilantro and stir. Salt to taste, mix and enjoy!

Savory Shiitake & Creamy Pinto Bean Burritos

If you could take a peek inside my Seamless order history…

you would discover that I’ve recently become a bit obsessed with mushroom burritos — and so I decided it was time I make my own.

As it turns out the most difficult thing about this recipe is mastering your burrito rolling but once you do, it’s a skill that will not go to waste because you’ll want to make these again and again.

After all, if you, like me, live for dynamic, layered flavor, burritos are literally a dream come true: all of that savory, spicy, crunchy, creamy goodness married underneath a soft, warm blanket of tortilla. Hello! Every bite is like taking a tiny flavor adventure.

For this burrito, tender, umami mushrooms are tossed in a buttery spice blend and layered with savory rice, sharp cheddar and creamy pinto beans - but please do not stop there! Include your add-on’s of choice: I like mine with crunchy radishes, homemade guacamole & sour cream. And don’t forget your favorite salsa or hot sauce. As always, follow your flavor intuition and make this recipe your own.


Savory Shiitake & Creamy Pinto Bean Burritos

Makes 1 Burrito

  • 1 burrito-sized flour tortilla

  • 2 medium Shiitake Mushrooms, cleaned & dried (you can also substitute with other mushroom types)

  • Kosher salt

  • Extra virgin olive oil

  • Neutral oil (avocado, sunflower, safflower, canola)

  • 1 Tbsp unsalted butter

  • 1/4 tsp Adobo Seasoning

  • Shy of 1/4 tsp Smoked Paprika

  • Shy of 1/4 tsp Ancho Chili Powder or Cayenne Powder

  • 1/4 tsp Garlic Powder

  • 1/4 tsp freshly ground Black Pepper

  • 2 Tbsps Creamy Pinto Beans

  • 3 Tbsps cooked rice, cooked in vegetable broth with a pinch of salt

  • 2-4 thin slices Sharp White Cheddar, more if you want it extra cheesy!

  • 2-3 Tbsps Sour Cream

  • OPTIONAL: thinly sliced radish rounds, homemade guacamole or pico de gallo

First cook up a batch of 1/2 cup uncooked rice and my Creamy Pinto Beans. These will render a few burritos but the following is instructions for making one burrito.

TIP: You’ll want to cook your rice in vegetable broth instead of water (half broth, half water works too), and add a pinch of salt. This imparts it with a lot more flavor.

If you plan to make homemade guacamole or pico de gallo, you will prep those first, too.

Then once your rice, pinto beans and any add-on’s are ready, make your mushrooms: score your clean, dry shiitakes along the top side, making cuts that are about an 1/8 inch deep.  This helps them to lay flat in the pan and cook evenly. Hit both sides with a drizzle of olive oil and a sprinkle of salt. Heat a sauté pan over medium high heat, and then add the mushrooms to the pan, scored side down: they should sizzle! If they don’t, remove them and let the pan get sufficiently hot first.

When the top side is golden brown, flip and sear until the bottom is golden - a few minutes per side.

Then remove the pan from the heat and place mushrooms on a cutting board until cool enough to handle. Cut into strips that are 1/2 inch wide .

Place your now empty pan back over a medium heat. To the pan add 1 Tbsp of butter and 1/4 tsp each of: Adobo Seasoning, Garlic Powder and freshly ground Black Pepper. Add just shy of 1/4 tsp of Smoked Paprika, and Ancho Chili Powder or Cayenne Powder. Stir everything together so that the spices are evenly distributed throughout the butter. When the butter is starting to get bubbly, add your strips of mushrooms back to the pan and toss in the butter and spice mixture for a minute.

Then remove the mushrooms again and set aside, leaving all of the excess butter and spices in the pan over medium heat. Now, don’t walk away! Stand over the butter just until it starts to smell toasty and turn brown. At that point immediately remove the pan from the heat and add your 3 Tbsps of cooked rice to the brown butter and spice mixture. Toss so that the rice is thoroughly coated. If you burn your butter and spices, don’t worry just skip this step and use plain cooked rice. You can also add fresh cilantro to your rice if you like.

Set the pan off to the side and make sure your burner is turned off. It’s time to build your burrito: to a large burrito sized flour tortilla, lay down your rice, beans and mushrooms a little bit off-center. Then top with your add-ons: sliced cheddar cheese, radish, guacamole, sour cream, pico de gallo etc. The key here is making sure you don’t overstuff the burrito or make it too liquid-y. If you do, it will be impossible to wrap (that’s why I’ve given you measurements for how much rice & beans to add).

To go about wrapping your burrito, first fold in the two sides. Then lift the side of the burrito that is facing you and fold it over those two sides and all of the ingredients. Use that to tuck in all of your ingredients, pulling them towards you into a little pouch. Finally turn the burrito over to seal that last side. If you’re a visual learner I love this video tutorial from Thrillist.

Now that your burrito is rolled, it’s time to get it warm and crunchy. This is where the magic happens!

That pan you had your spices & butter in? Give it a good rinse and then dry it off completely (seems annoying, I know, but using one pan for all of this really just means fewer dishes later!). Place this pan back over a medium-high heat and add enough of a neutral, high-smoke point cooking oil to just coat the entirety of the bottom of the pan. When the oil is shimmering and hot, add your burrito to the pan FLAP SIDE DOWN. You first want to seal this side off. Allow it to get golden brown and crispy, a few minutes depending on how hot your pan is. Then flip and repeat on the top side, until golden and crispy.

Eat while warm and enjoy with even more of your favorite toppings and hot sauces!

Creamy Rigatoni w. Leeks, Sausage & Oregano

This dish is the perfect fall meal. You’ll have to make it and see what I mean…

The light has already started to slant into my apartment differently come mid day, and I’m reaching for a cozy sweater instead of flip flops for my evening walks. When dinner rolls around I look right past the raw greens for something cozy, like this rich, herbaceous rigatoni.

It comes as no surprise to me that this time last year I was publishing the recipe for my Baked Rigatoni Vodka, because any iteration of rigatoni will do when it comes to cold-weather comfort food. This sauce layers umami from browned pork sausage and tomato paste with the savory aromatics of oregano and leeks. Finished off with smooth heavy cream and starchy pasta water, it creates the perfect luscious jacket for al dente pasta. I served mine with a crisp white wine (because it’s not winter yet, okay?!) but I’ll leave the beverage choice to you.


Creamy Rigatoni with Leeks, Sausage and Oregano

Serves 2-4

  • 6 oz ground pork breakfast sausage, from a roll or removed from link casing

  • 1/2 cup thinly sliced leeks, washed, tops removed

  • 1 Tbsp loosely packed fresh or dried oregano

  • 3.5 heaping Tbsps tomato paste

  • 1/4 cup heavy cream

  • 1/4 cup white wine

  • 1/4 cup vegetable broth

  • 1/4 - 3/4 tsp red pepper flakes

  • 1/4 - 1/3 cup starchy pasta water, reserved when straining pasta

  • Coarse kosher salt

  • Fresh grated Parmigiano-Reggiano

  • Freshly grated black pepper

Fill a large pot with 2 Qt of water (8 cups) for your pasta. Place over medium heat while you make the sauce.

Place a 10-12 inch pan with high sides over medium heat (I love doing this in a cast iron). To the pan add a splash of olive oil. Add pork and break it up using a spoon or spatula. Pat down the pieces of pork into a single layer in the bottom of the pan. Let it brown, 3-4 minutes. Add 1/4 tsp of red pepper flakes and 1/4 tsp of salt. Stir, loosening the pork from the bottom of the pan. Then pat back down into a single layer and let brown another 3 minutes. At this point the pork should be brown and crispy. Turn the heat down to medium and add the leeks. Stir and sweat for 1-2 minutes until starting to soften.

Meanwhile, when your pot of water for the pasta is nearly boiling add 3 tsps of coarse kosher salt. Let dissolve.

To the pan with the pork and leeks add 3.5 heaping Tbsps of tomato paste, stir and let cook 1-2 minutes allowing the paste to deepen in color. Turn the heat down to medium-low and deglaze the pan with 1/4 cup of white wine, stir and then allow to simmer gently for a minute or two for the alcohol to cook off.

At this point your pasta water should be boiling. Add rigatoni and cook 10-12 minutes until al dente.

To your sauce, add the 1/4 cup of heavy cream and stir to combine. Let simmer a minute or two, then taste. Add more salt as needed and a few cranks of fresh black pepper. For a spicier sauce add another 1/4 - 1/2 tsp of red chili flakes. To the sauce add your oregano and 1/4 cup of vegetable broth. Let simmer over low heat while pasta cooks.

When the pasta is ready, strain making sure to reserve 1/4 - 1/3 cup of the starchy pasta water. Add cooked pasta to the pan with the sauce. Gently stir, and pour in starchy pasta water until all noodles are thoroughly coated in sauce. You may not need all of the water: add until sauce is loosened to desired consistency.

Serve with fresh Parmigiano-Reggiano on top, a little more oregano and black pepper - and dig in immediately! (Cozy clothes optional but recommended).

Chili & Cilantro Fairytale Eggplant w. Labneh

Fairy Tale eggplant are a summer delight.

If you love eggplant but avoid large, globe eggplant, which can be bitter and require time & love to bring out their tender side, then this tiny eggplant cousin is for you.

Tender and easy to cook with a deliciously mild flavor, these eggplant have been coming home with me week after week from the farmer’s market. All they need is a little oil and 3-5 minutes cut side down in a hot cast iron. Slightly larger ones may need another few minutes on the other side, and then they’re ready to be served any way you like. This dish is definitely one where you can flex your creativity and choose your own adventure: I like mine served warm over labneh, with a drizzle of chili oil, one final dash of salt and fresh cilantro.


Chili & Cilantro Fairytale Eggplant with Labneh

Serves 2

  • 10-12 Fairy Tale Eggplant

  • Neutral oil, like Avocado, Safflower or Sunflower

  • Kosher salt

  • Freshly ground black pepper

  • 2-3 heaping spoonfuls labneh

  • Chili oil, like Fly by Jing or Chili Onion Crunch from Trader Joe’s

  • Fresh cilantro or other fresh herb

Heat a well seasoned cast iron over med-high heat.

In the meantime, wash and cut Fairy Tale eggplant in half lengthwise. Drizzle the cut side with neutral oil, sprinkle with salt and freshly ground black pepper.

When the cast iron is hot, place the eggplant cut side down until they’re golden and seared, 3-5 minutes. Larger eggplant may need another few minutes on the other side to become tender throughout. Remove eggplant from the cast iron and let cool a few minutes.

Plate over a few heaping spoonfuls of labneh. Drizzle with your favorite condiment like chili oil or zhug. Finish with fresh cilantro and/or other fresh herbs. Enjoy!

Spicy Burst Cherry Tomato Bucatini w. Corn & Burrata

This pasta is like Aglio e Olio got all dressed up for summer vacation…

I’m a sucker for something sensationally simple: perfectly al dente Bucatini generously bathed in spicy, garlicky corn sautéed in butter and cherry tomatoes burst in a little olive oil.

I know … it’s still August and asking you to turn on your ovens, even if to experience the joy of burst cherry tomatoes, may be pushing it, so do the job in a hot sauté pan if need be.

Give the pasta a little time to soak up the delicious flavors of the sauce and serve this room temperature - it’s seriously delightful and perfect for the last of your summer picnics and BBQ’s. Just make sure the pasta is al dente because no one like Soggy-Noodle-Energy. Serve the burrata right on top, on the side, or forego it if you absolutely insist (dairy free friends, I respect your choices).

 
AM2A7376.JPG
 

Spicy Burst Cherry Tomato Bucatini with Corn and Burrata

Serves 2-3

  • 8 oz dry Perciatelli or Bucatini

  • 1 heaping cup cherry tomatoes, 212g

  • 3 crushed garlic cloves

  • 1/2 tsp kosher salt

  • 3-4 Tbsp EVOO

  • Freshly ground black pepper

  • 1 corn cob, 1 cup of corn kernels, 120g

  • 3 garlic cloves, thinly sliced

  • 1 Tbsp butter

  • 1/8-1/4 cup of thinly sliced hot red chilis

  • 1/4 tsp kosher salt

  • OPTIONAL: fresh basil

Preheat your oven to 375F. If you plan to burst your cherry tomatoes in a hot sauté pan, skip this.

Start by crushing three garlic cloves. Rinse your cherry tomatoes and place in a small baking dish (a sheet pan with high sides works, too). To the cherry tomatoes add your crushed garlic cloves, 1/2 tsp kosher salt, 3-4 Tbsp EVOO and a few cranks of freshly ground black pepper. Place in the oven for 15-20 minutes or until cherry tomatoes have burst.

Start a large pot with 2.5 Qt of water to boil, adding 2 Tbsp of salt so that water tastes noticeably salty. Cook Bucatini or Perciatelli until just al dente.

In the meantime, prepare the corn: remove the husk and silk from your ear of corn and cut in half. Stand each half up on it’s flat, cut side, and using a sharp knife, remove the kernels from the ear. Thinly slice 3 garlic cloves and 1/8-1/4 cup of hot red chilis (depending how much heat you like and how hot your pepper is).

In a small sauté pan, place 1 Tbsp butter over med-high heat, occasionally swirling, until butter is very fragrant but not browning - 2-3 minutes. Add the garlic and chili, allowing to cook for a minute or two, making sure not to burn the garlic. Add the corn and sauté, 5 or so mins, until corn is tender but maintains some bite. Add 1/4 tsp salt, stir and then remove from the heat.

Combine the cooked corn with the cherry tomatoes and mix. Taste and adjust seasoning as needed. Strain the cooked pasta, reserving 1/4 cup of the pasta water. Let the noodles cool a minute or two before adding the mixture of burst cherry tomatoes and sautéed corn to the pasta. If it needs a little more “sauce”, add the pasta water and stir vigorously to combine. Serve room temperature, with a creamy ball of burrata on top, on the side or forego the burrata if cheese ain’t your thing! Hollow noodles aren’t slurp-able, but they’re so fun to eat.

Sweet Summer Corn & Gouda Cornbread

The number one reason I can’t stop making this cornbread?

… the moist pockets of buttery corn & gouda cheese. Corn bread can sometimes be a bit dry, so when writing this recipe I heeded some useful wisdom I stumbled upon while doing research — adding AP flour to cornbread makes it a lot more moist, with a slightly more cake-like consistency.

And yeah, I’m a huge fan: the soft texture makes it a pleasure to eat both warm and cold - right out of the fridge. A perfect way to use up ears of corn that didn’t make it to the grill… or just an excuse to make cornbread? I’ll let you decide.

AM2A7479.JPG

Sweet Summer Corn and Gouda Cornbread

Serves 8+

  • 1 cup all-purpose flour

  • ½ cup Indian Head Yellow Corn Meal

  • 1/3 cup turbinado sugar

  • 1 teaspoon salt

  • 2 ½ teaspoons baking powder

  • ¼ cup +2 tablespoons oil

  • 1/4 cup milk

  • 1/4 cup labne + 1/2 Tbsp milk

  • 2 eggs

  • 1 ear corn, 120g corn kernels

  • 1 Tbsp butter, 13g

  • 1/2 cup Grated gouda + a little extra to melt on top at the end (grate while cheese is cold as gouda is quite soft)

Preheat oven to 375.

Combine dry ingredients (flour, sugar, salt and baking powder) in a mixing bowl. Use a whisk to combine.

Remove husk and silk from your ear of corn and cut in half. Stand each half up on it’s flat, cut side, and using a sharp knife, remove the kernels from the ear. In a small saute pan, place 1 Tbsp butter over med-high heat, occasionally swirling, until butter is very fragrant but not browning - 2-3 minutes. Add the corn and sauté, 5 or so mins, until corn is tender but maintains some bite. Add 1/4 tsp salt, stir and then remove from the heat. Let cool while you combine the wet ingredients.

In a separate mixing bowl, combine oil, eggs, milk and the mixture of 1/4 cup labne + 1/2 Tbsp milk, whisked together to loosen the labne.

Finally, to the wet ingredients add the cooled corn and 1/2 cup of grated gouda.

Using a balloon whisk mix together the wet and dry ingredients until the batter is uniform — it will be slightly lumpy. Avoid over whisking the batter, but scrape down the sides and bottom to make sure there are no dry pockets of flour. Pour the batter into a greased 5” x 9” loaf pan and bake for 30 minutes.

After 30 minutes, remove the cornbread from the oven. Insert a cake tester, skewer or knife and make sure it comes out dry.

Switch the oven to the high broil setting. Grate a little extra gouda cheese on top of the corn bread and place under the broiler to melt the cheese — just 2-3 minutes. Remove from the oven and let come to room temperature. Run a knife around the edge of the loaf pan to loosen, flip to remove and serve warm or refrigerate until you’re ready to enjoy.

Maple Citrus Plum Jam w. Ginger

Tangy, seasonal & sweet…

This plum jam recipe was born out of a collaboration with Fraiche Kiosk for their 2021 Seasonal Fruits & Vegetables Calendar. In July, plums are exquisite and now is the time to take advantage, so go on — get jammin’ [was that a dad joke?].

Print and digital copies of the Seasonal Calendar are still available here! 10% of proceeds from sales are donated to Rethink Food, a nonprofit working to reduce food insecurity in the New York area. Each month features seasonal ingredients, monthly recipes (including mine!) & Fraîche’s suggestions for a more environmentally friendly life.

AM2A2596.JPG

Maple Citrus Plum Jam with Ginger

  • 2 lbs ripe plums, Empress or other variety

  • ½ cup of maple sugar, or natural sweetener of your choice

  • ½ cup water

  • Juice of ½ - 1 whole lemon or lime, to taste

  • ½ - 1 tsp raw grated ginger, to taste

Thoroughly rinse your plums, then cut in half and remove pits. Make sure there are no small pieces stuck to the plum flesh. Cut plum halves into quarters and add to a med-large sauce pot. Add water and sugar or other sweetener to the plums, and mix. Start the mixture over a medium heat. When it starts to simmer, turn down to a low heat and cook, stirring very often to make sure the sugars don’t burn on the bottom of the pot.

Cook about 45 minutes - 1 hour, or longer, until jam has reached desired thick consistency. Test thickness using an ice cold spoon from the freezer — when the jam sets on the cold spoon it reflects how thick the jam will be once cooled. At this point add fresh squeeze citrus juice , strained of any solids, and raw grated ginger to taste. Mix thoroughly. Let cool before storing in a jar in the fridge.


Seared Cumin Pork Chops w. Mango Salsa

I’ve been working at mastering seared pork chops…

Even though I had a clear idea of the general technique, my chops still seemed to lack something very important: juiciness. I decided it was time to roll up my sleeves and write a recipe for pork chops that won’t disappoint.

The key is to do everything you possibly can to avoid dryness: pork chops are a lean cut of meat so even when just slightly overcooked, they become tough and dry. That said, have no fear: this recipe employs numerous techniques that will protect you from this pork-pitfall.

First, use bone-in chops: the extra fat and connective tissue protects the meat from drying out (and of course, fat adds flavor!). Next, brining: this seasons and moistens the pork from the inside out. And finally, using a meat thermometer so you avoid cooking the pork any longer than is absolutely necessary (if your meat thermometer isn’t your best friend yet, it is now). Once you’ve moved the pan off the heat you baste with butter, cumin seeds and crushed garlic. Finish with a quick summery mango salsa for peak pork chops.

 
AM2A3542.JPG
 

Seared Cumin Pork Chops with Mango Salsa

  • 2 bone-in pork chops, approx. 10-12 ounces each

  • 8 small-medium garlic cloves, crushed

  • 2 Tbsps grass fed butter

  • 1 Tbsp cumin seeds

  • 1 Tbsp neutral oil

  • 3 cups room temperature water

  • 1/2 cup kosher salt

  • 1/2 cup packed brown sugar, or granulated brown sugar

  • Freshly ground black pepper

  • Kosher salt

  • OPTIONAL: 1 ripe mango, 1/8 cup finely diced red onion, cilantro, pinch of kosher salt

First up is our brining process. This seasons and moistens the pork chops from the inside out.

Place your 2 pork chops on a cutting board or baking sheet. Prick pork chops on both sides with a fork, not sinking the fork in very deeply - if you’re being technical, about 1/8 inch deep.

In a gallon Ziploc or Stasher bag, add 3 cups of room temperature water, 1/2 cup kosher salt, and 1/2 cup packed brown sugar. Use a spoon to stir until the salt and sugar has mostly dissolved. Add the 2 pork chops, seal the bag and lay bag down again on the baking sheet or cutting board so that the pork chops sit in a single layer in the bag. Place in the fridge for 30 minutes, or up to 8 hours.

Before you are going to cook the chops, remove them from the brine. Discard brine and pat your chops dry. Bring them to room temperature. Get the butter, cumin seeds and crushed garlic cloves ready for when it’s time to baste. You don’t want to be scrambling to get these later.

If you are serving with quick mango salsa, make that now. Cut off the top of the mango and from this opening, peel off the skin. Remove the cheeks of the mango, cutting around the the hard inner core.

Once room temperature and RIGHT before cooking, season your pork chops all over with just a little kosher salt and freshly ground black pepper. These have been seasoned during brining, so you only need a little.

Start to heat a cast iron pan over medium high heat (make sure your pan can comfortably accommodate both chops without crowding — this is important). After about a minute, add 1 Tbsp of neutral oil to the pan, tilting the pan so that the oil evenly coats the bottom. After another minute or so, when the oil is shimmering and you see a little smoke, add your pork chops. They should sizzle when they hit the pan. If they don’t, remove the pork and wait another minute before continuing,

Once the pork chops are in the pan, start a timer for 8 minutes total. Cook the first side of the pork chop for 1 minute, undisturbed. Then, flip and cook the second side undisturbed for 1 minute. Next, using tongs to hold the chop, cook the flat, meaty side of the chop with the fat cap on it (not the bone side) for a minute, gently rocking it so the whole side gets contact with the pan. Repeat the entire process, cooking each of those three sides for 1 minute before flipping. At about 4-5 minutes you should start to see the golden brown sear developing. At 8 minutes, insert your thermometer into the thickest part of the meat: if the thermometer reads 130-135, turn off the heat and move on to basting. If it doesn’t, continue searing and flipping for another minute or two until it reaches this temperature.

Once the meat has reached 130-135 and you’ve turned off the heat, immediately add your butter, cumin seeds and crushed garlic cloves to the pan. Tilting the pan away from you, use a large spoon to baste the pork with the foamy butter, cumin seeds and garlic. Baste on both sides, and then check the internal temperature again: leave the meat in the hot pan until it’s reached 140-145F. Once it has, remove the meat from the pan and set on a clean cutting board. Let rest a few minutes before cutting into thin slices and serving immediately. Drizzle with garlic and drippings from the pan, as well as the quick mango salsa. Enjoy!

Basmati Rice w. Dates, Cardamom & Clove

There are few things more comforting than a great bowl of rice.

This sweet, savory, fragrant basmati rice is no exception. Serve it as a side with just about anything from vegetables to proteins, or add chickpeas and make this the main event, finished with a drizzle of yogurt and Tamarind chutney.

AM2A0235.JPG

Basmati Rice with Dates, Cardamom and Clove

  • 1 cup basmati rice

  • 3-4 dates, pits removed and loosely chopped 

  • 11 whole cloves

  • 2 whole cardamom pods, crushed 

  • 1 Tbsp coconut oil 

In a pot add 1 Tbsp coconut oil, 2 lightly crushed cardamom pods, 11 whole cloves and 3-4 dates chopped into small pieces.

Cook together for a minute or two over medium heat, letting the spices get fragrant. Then add your rice to the pot and stir to combine. After a minute, add 1 3/4 cup water to the pot.

Bring to a boil. Once boiling, lower the heat, cover and simmer for 12-15 minutes, or until cooked (follow directions for the brand of rice you’ve chosen).

Once cooked, remove whole cloves and cardamom pods. Add a pinch of kosher salt, mix and enjoy.

Cool Rose Cardamom Pudding w. Coconut Creme & Raspberries

Cardamom and rose are an effortless combination.

I love to start my day with a bowl of this cool pudding, or have it as an easy dessert after a savory meal. Top it with anything you please, but it’s really wonderful with a spoonful of fluffy SoDelicious Cocowhip, these addictive pistachios, a quick raspberry mash & lemon zest.

AM2A0376.JPG

Cool Rose Cardamom Pudding with Coconut Creme and Raspberries

1 Serving 

PUDDING

  • 1 cup whole milk

  • 6 whole cardamom pods

  • 1/2 Tbsp sugar (any kind will do)

  • 1 1/2 tsp rose water

  • 1 Tbsp cornstarch loosened with 1 3/4 Tbsp milk

GARNISH

Add 1 cup whole milk and 6 crushed cardamom pods to a small pot. Bring to a boil, mixing occasionally. Then immediately lower to a simmer, another 3-4 mins.

Remove from the heat to steep while cooling, 10 mins. Then using a fine mesh strainer, strain milk into another pot or a bowl. If you plan to use the same pot, just clean off any milk that stuck to the pot before adding the strained milk back to the pot. You don’t want any chunks in your pudding.

Mix a slurry of 1 Tbsp cornstarch and 1 ¾ Tbsp milk. Place pot with strained milk back over a medium heat & bring to a simmer. Add ½ Tbsp sugar & 1 ½ teaspoons rose water. 

In order to activate the thickening power of the cornstarch, the milk must reach a gentle boil before you add the slurry (cornstarch and milk). Once it is boiling, pour in the slurry while mixing. Turn the heat down and simmer, mixing frequently, 2-5 minutes. The milk should have thickened and it will continue to firm up more once cooled in the fridge.

Pour pudding into a small dish and allow to cool before putting in the refrigerator at least 3 hours.

When ready to serve, mash fresh raspberries (the more ripe the raspberries, the better) and add a spoonful to the top of the pudding along with some Honey & Za’atar Smokey Roasted Pistachios, lemon zest and edible dried rose petals if you have. Finish with a dollop of SoDelicious Dairy Free Coco Whip and enjoy immediately!

Honey & Za'atar Smokey Roasted Pistachios

Addictive and very snack-able.

These pistachios have found themselves a consistent presence in my fridge. I reach for them as a solo snack, tossed into nearly every salad I make, on top of morning kefir bowls and also crowning a soon-to-arrive recipe for Rose Cardamom Pudding.

 
Micole Rondinone Honey & Za'atar Pistachios
 

Honey & Za'atar Smokey Roasted Pistachios

1 Serving 

  • 1 cup raw shelled pistachios

  • 1/4 tsp smoked paprika

  • 1/2 tsp za’atar

  • Kosher salt

  • Honey

  • OPTIONAL: zest of a clean lime

Preheat your oven to 300 F

Put some parchment down on a half sheet baking tray.

Add 1 cup of raw shelled (or unshelled) pistachios to the parchment. Drizzle with honey and then sprinkle with 1/4 tsp smoked paprika, 1/2 tsp za’atar and a good pinch of kosher salt.

Use a utensil to give the pistachios a mix before flattening them into a single layer.

Place in the oven for 15-20 minutes. They should be fragrant!

You can finish them with a bit of lime zest if you want! Serve immediately warm, or bring to room temperature before storing in the fridge up to 2 weeks.

Warm Roasted Vegetable Goat Cheese & Romesco Sandwich

Don’t believe anyone who says plants can’t taste frigging amazing.

I’ll avoid using profanity here, but this is a topic I feel strongly about: when you treat vegetables the right way - impart them with lots of flavor and layer textures - they become something else entirely. This sandwich builds on the classic combination of beets and goat cheese, adding crispy fennel, sweet fig balsamic and Shab's Sauce Red Pepper Romesco.

In typical The Kitchen fashion, it's a flavor party: it’s creamy, crunchy, garlicky, savory, earthy, sweet and smokey. Make sure you roast plenty of beets and save the leftovers to use throughout the week - for these sandwiches, in bowls, salads, over labne with za’atar as a snack.

We will also be making the most of our beets and avoiding food waste by including the beet greens in our sandwich once they’ve been sauteed with plenty of garlic first, of course.

 
Micole Rondinone Beet Sandwich
 

Warm Roasted Vegetable Goat Cheese & Romesco Sandwich

1 SANDWICH

  • 2 slices of good bread, like Amy’s Rye Sourdough

  • 1 large bunch beets and it’s greens, and for this recipe 2 small roasted beets, cut into thin rounds and large handful beet greens

  • 1-2 tbsps of goat cheese

  • 3-4 flesh cloves of garlic

  • Roughly 1/2 cup thinly sliced fennel bulb and a few leafy fronds

  • Shab’s Sauce Roasted Red Pepper Romesco

  • Fig Balsamic

  • Freshly ground black pepper

  • Kosher

  • Extra virgin olive oil

If you can find pre-roasted, peeled beets feel free to use those. Otherwise, if you are roasting your beets, start here. Preheat your oven to 400F. In the meantime, cut the beets from their large stalks and greens, setting those aside. Rinse the beets thoroughly of any excess dirt, and then trim both the top and bottom so they are flat on both ends. Peel the beets, as this makes them faster to use up once roasted.

Place peeled beets in a small baking dish and drizzle with extra virgin olive oil. Sprinkle with a good pinch of kosher salt, some freshly ground black pepper and toss to coat. Add just shy of 1/4 cup water to the baking dish, cover and put in the oven for up to 60 mins, or until completely fork tender but not mushy. I love checking my vegetables using a cake tester.

While the beets are in the oven, cut beet greens from the thick, tough stalks. Thoroughly rinse them and then spin dry in a salad spinner or gently dry in a clean kitchen / paper towel. Chop 3-4 fresh garlic cloves and set aside. We will use a large handful of the greens per 1 sandwich. Wrap any remaining greens in a dry, clean towel and place in the fridge.

Take your goat cheese out so it comes to room temperature and becomes easier to spread.

Trim off the bottom end of the white fennel bulb. Then using a mandolin or a sharp knife, cut roughly 1/2 cup of very thin rounds. Remove a few of the fuzzy fronds to add to the sandwich as well. Set aside. (Use the rest of the fennel during the week for this simple salad.)

When the beets are ready, remove from the oven and carefully lift the foil, being careful of the hot steam. Leave the beets in the baking dish uncovered to cool.

In a pan, heat olive oil until shimmering and hot. Add garlic and allow to cook in the oil for 30 seconds. Then add clean beet greens, stir to coat, adding a splash more olive oil if you want. Cook a few minutes until greens are wilted but still bright green. Move all garlic and greens to a small plate. Leave the pan on the heat to crisp your bread. Raise to a medium high heat.

Brush your two pieces of bread with oil or butter on one side. Add to the same pan the greens were in and over a high heat allow to get very crispy and golden. Add butter or oil to the side facing up and then add back to the pan with that side facing down, allowing it to also get golden and crispy.

When the bread is done, remove pan from the heat. Add 1 tbsp of plain goat cheese to both pieces of bread and spread thin. To one piece of bread, add 1 tsp of Shab’s Sauce Roasted Red Pepper Romesco and spread, mixing it into the goat cheese. On top of that, place thinly sliced rounds of roasted beet - roughly 2 small beets or 1 large per sandwich.

Add thinly sliced fennel and fennel fronds. Carefully drizzle with a bit of fig balsamic. Top with the second piece of bread, cut in half using a sharp knife and serve immediately!

Date Roasted Carrot Salad w. Burrata, Mint & Chili

I love the transformation of humble ingredients.

Carrots are so simple and a thought I had recently was that I don’t make them enough. Though I occasionally think of baby carrots as a counterpart for hummus, for the most part, right size, whole carrots fall out of my consciousness when it comes time to grocery shopping. I find that, like eggplant or other certain vegetables, the deliciousness of a carrot is all about knowing how to treat it: not well seasoned or well cooked, a carrot would gladly be easily forgotten. So, yes, you are going to be sure to bathe these in a mixture of butter and sweet date (or fig) jam and cook until caramelized and completely melt in your mouth tender. To go the no-food-waste mile, be sure to use some of the carrot stem as a garnish.

 
AM2A8821.jpg
 

Date Roasted Carrot Salad with Burrata, Mint & Chili

Serves 2

  • 7 thin carrots, or cut in half if they are wide, total 8 oz

  • 1.5 Tbsps unsalted butter 

  • 1 Tbsp date jam (or use fig jam)

  • Small bunch of fresh thyme

  • Toasted sunflower seeds

  • 1 ball of burrata 

  • 1/2 small hot red chili, finely sliced

  • Fig balsamic

  • Fresh mint for garnish

  • OPTIONAL; carrot stems very finely minced

  • Kosher salt

  • Freshly ground black pepper

  • Neutral oil

Preheat your oven to 400F. First rinse & scrub your carrots. Trim the carrot stems down so that just a short stem remain. Keep a few of the stems without any of the leaves.

Dry your clean carrots and in a high-heat, oven safe pan (like stainless steel or cast iron), heat a little neutral oil over high heat until hot and just barely smoking. Add the carrots, making sure they can sit in a single layer. You’ll probably need a 8-10 inch pan. Add two pinches of kosher salt and a few cranks of freshly ground black pepper and toss the carrots a bit in the pan. Sear, turning occasionally, 5-7 minutes, until golden brown on all sides.

In the meantime, mix 1.5 Tbsps of melted unsalted butter with 1 Tbsp of date (or fig) jam. Add a pinch of kosher salt and stir well.

When the carrots have a slightly golden hue all over, remove the whole pan from the heat. Set on a cool burner and wait a few minutes to allow the pan to cool slightly.

Using tongs, lift carrots and place your bunch of thyme down in the pan. Place carrots back on top of the thyme, brush evenly with the butter and date (or fig) glaze and then put the pan in the oven 12-15 minutes or until carrots are fork tender all the way through.

While the carrots are in the oven, very, very finely chop a bit of thin, clean carrot stems.

Slice a hot red chili into very thin rounds. When the carrots are ready, carefully remove the pan from the oven. Pull off the bundle of thyme and move carrots to a cutting board.

Cut them on the bias into smaller segments and place into 2 bowls, layering the carrot. Cut burrata open and place a half of burrata in each bowl next to the carrots.

Top with rounds of hot chili, a few small leaves of fresh mint, toasted sunflower seeds a sprinkle of the very finely cut carrot stem.

Cut burrata open, and drizzle with fig balsamic.

Sichuan Peppercorn Skirt Steak Tacos w. Black Garlic Labne, Scallions & Honey

Tangy Sichuan peppercorns, savory black garlic, and fresh habanero…

One of my favorite kitchen tools is the humble mortar and pestle. Sure, I don’t whip this thing out everyday, but on the occasion I do I feel so connected to my food and in control of flavor. While I use it mostly for grinding whole spices, I also love it for making marinades, like this one, or sauces like a mortar-and-pestle Pesto. Start by grinding whole ingredients and finish with fats or liquids. Here I combine Sichuan peppercorns with black garlic, fresh habanero and a mix of other smokey, savory spices to get a crusty layer of flavor on the steak once seared.

My big note with this recipe — don’t be turned away by the ingredient list. If you can’t get access, substitutions can be made: instead of black garlic use whole roasted garlic cloves, and swap labne for a thick, whole fat, tangy greek yogurt. That being said, the Sichuan peppercorns are sort of a must and these are a great opportunity to expand your flavor library. I also encourage you to try and get your hands on my new favorite Red Habanero hot sauce from Queen Majesty, based a whole 11 minutes from my apartment right here in Long Island City, Queens!! Lastly, you can always rely on me to deliver food full of unexpected flavors so there were some creative decisions, like finishing with honey, that I'll just need you to trust.

 
AM2A8286.jpg
 

Sichuan Peppercorn Skirt Steak Tacos with Black Garlic Labne, Scallions & Honey

STEAK MARINADE

  • 1/2 Tbsp cumin

  • 1/2 Tbsp Sichuan peppercorns

  • 1 clove black garlic, steamed to soften, or 1 clove of roasted regular garlic

  • 1/2 tsp smoked paprika

  • 1 tsp natural turbinado sugar, or any kind of granulated brown sugar

  • 1/4 - 1/2 of a small fresh habanero, finely chopped with seeds for more heat (.1 -.2 oz)

  • 3/4 tsp salt

  • Shy of 1/4 cup neutral oil

  • 2 tsp tamari

BLACK GARLIC LABNE

  • 1/2 cup labne

  • 4 cloves black garlic, steamed to soften, or 4 cloves of roasted regular garlic

  • Juice of 1/2 lime

For this recipe, I loved using black garlic: it’s an aged garlic that is less sharp than raw garlic and super savory. You can find it online and in some specialty food stores and while it’s a bit of an investment, it’s great to have on hand in your flavor library. If you can’t get access to it, slow roast garlic and use that throughout instead. Also, if you can’t access labne, use a thick, full fat, tangy greek yogurt instead, like Fage.

Start by making your marinade. If you have a mortar and pestle, use that. Otherwise, blend everything with the oil and tamari in a food processor. You are going to need: 1/2 Tbsp cumin, 1/2 Tbsp Sichuan peppercorns, 1 clove black garlic, steamed to soften (or 1 clove of roasted garlic), 1/2 tsp smoked paprika, 1 tsp natural turbinado sugar, or any kind of granulated brown sugar, 1/4 - 1/2 of a small fresh habanero, finely chopped with seeds for more heat (.1 -.2 oz), 3/4 tsp salt, shy of 1/4 cup neutral oil and 2 tsp tamari.

Add the steak and marinade to a Tupperware or reusable Ziploc bag, making sure the steak is covered all over. Put in the fridge for 1 hour, but ideally up to 24 hours.

Next, prepare the black garlic labne. I find that steaming the black garlic cloves first allows them to fold into the labne more uniformly. Place 4 black garlic cloves in a steamer, or you can do what I did and simply suspend the cloves inside a small pot over about 1/2-1/4 cup of boiling water using a small mesh strainer. Cover with a top and let steam for a few minutes. Skip this step if you are using roasted garlic. Blend garlic, labne and juice of a half a lime until smooth.

When it’s time to sear the steak, be sure to bring the steak to room temperature first. Using a cast iron (or stainless steel pan), heat the pan until very hot with a bit of smoke coming off of it. Then add the marinated steak, searing over high heat 2-4 minutes per side for medium rare, depending how thin your cut of steak is. Go a little longer if you want it more well done. Let the steak rest, 5-7 minutes.

While the steak rests, char your tortillas carefully over a low-medium flame on your stovetop burner, using tongs to flip them every 30 seconds or so. If you don’t have a gas stovetop, crisp them a little under your oven broiler.

When ready to serve, cut the steak into strips or cubes. Spread a spoonful of black garlic labne on each tortilla and top with steak. Top each taco with scallions cut on the bias, a drizzle of honey and this Queen Majesty Red Habanero & Black Coffee hot sauce. I love how it has a balance of heat and flavor. Find out where you can buy it here.

Plant Based Roasted Sweet Potato Queso-Style Dip w. Caramelized Onions

Seriously, who doesn’t love a dip?!

I’m obsessed with female owned nut milk brand Three Trees. When I worked with them last year I fell in love with their incredible, creamy milks and instantly knew it would make the perfect base for a plant based dip. I’m also going to recommend some of my favorite tortilla chips from Xochitl for their ratio of thinness to dip-carrying-capacity.

Yes, this is a plant based “queso-style” dip and I put that in quotations in case you’re someone who does not believe in veganizing: I would hate for you to miss out on this dip for that reason. It’s just a great dip trying to be great! Made with simple plants and lots of flavor, we start by roasting the sweet potato and sautéing onions. This may seem like an extra step but don’t skip it, please. The name of the game to great food is LAYERING FLAVOR. When we roast and sauté our ingredients, we impart them with flavor before we’ve even blended and seasoned our dip. You can do this up to 2 days in advance, and then blend up later. Come over and make the recipe with me here!

 
AM2A7775.JPG
 

Plant Based Roasted Sweet Potato Queso-Style Dip with Caramelized Onions

Serves 6-8

  • 2 x medium sweet potatoes, 1 lb total

  • 1 medium yellow or Spanish onion

  • 1 Tbsp unsalted butter

  • 1 small white onion

  • 1/2 tsp cayennne powder

  • 1/2 tsp cumin powder

  • 1/2 tsp smoked paprika

  • 1/2 tsp chili powder

  • 2 cups Three Trees original almond milk

  • 2 Tbsp nutritional yeast

  • 4 Tbsps white wine or apple cider vinegar

  • 2 tsp chipotle Cholula, and more for serving

  • Fresh cilantro

  • 1 lime

  • Kosher salt

  • Coconut oil

  • Olive oil

  • OPTIONAL: 1.5 tsps corn starch for thickening

  • Xochitl Organic Blue Corn Tortilla Chips

Preheat oven to 380F degrees.

Peel and cut sweet potatoes into rounds. Add to a mixing bowl with 1.5 Tbsp coconut oil and a sprinkle of kosher salt. Toss to evenly coat.

Lay sweet potatoes on a baking sheet in a single layer and bake for 30 mins or until golden on both sides, flipping halfway through. When finished, cut rounds down loosely into quarters for easier blending.

In the meantime, let’s make caramelized onions: take your medium yellow or Spanish onion and remove the top and bottom root end so that it’s flat on both ends. Peel off outer skin. Cut onion in half, top to bottom, and then slice into thin, half moons. Add all the onions to a large pan with a splash of olive oil. Cook 15-20 mins over low heat, stirring frequently. If the pan gets dry, add a splash of water and mix. If the onions are cooking too fast and burning, turn the heat down.

When the onions are significantly cooked down, add 1 Tbsp butter to the pan and continue to cook over low heat until they are a deep golden color. Add a sprinkle of kosher salt. Remove from heat and set aside.

In a pot with a splash of olive oil, sauté 1  cup of loosely diced white onion. After a few minutes when the onion has started to soften, add a sprinkle of salt and 1/2 tsp cayenne, cumin powder, smoked paprika and chili powder. Mix and cook together another minute or so.

Then remove from the heat and add sweet potato pieces to the pot along with 2 cups Three Trees almond milk. Blend using a food processor, immersion or standard blender until smooth.

Taste and add a touch more salt if it needs. Also add 2 Tbsp nutritional yeast, 4 Tbsps white wine or apple cider vinegar and 2 tsp chipotle Cholula. Once all blended, place back in the pot and bring to a simmer, mixing frequently so you don’t burn the dip on the bottom of the pan. Once it’s bubbling, add a slurry to the pot to thicken - 1.5 tsps corn starch with 2 tsps water. The heat will activate the starch, thickening the dip, so continue to cook and mix for a minute or two after adding.

Remove from the heat and let cool a few minutes. Top with plenty of fresh cilantro, juice of half a lime, and all of the caramelized onions. You can even add another splash Cholula if you like. Live your best dip life!