Green Pasta w. Citrus Panko "Grattato"

Who doesn’t love a 2-for-1 jackpot?

Yes, this pasta sauce is a perfect way to use up the greens you forgot about in the bottom drawer. But, the magic is you get to walk away with dinner done AND a snackable spinach dip — ready to go for your nibbling pleasure — that comes together in about 30 seconds from the remnants of your sauce. You should know, too, that this recipe has a special place in my heart; an ode to the very first recipe I ever wrote back in 2017. This dish is steeped in personal history, and I hope it feels like a warm hug of gratitude when it reaches you.


Green Pasta with Citrus Panko "Grattato"

Serves 2-3

  • ½ 9 oz bag raw spinach, 4-5 oz

  • 1 small bunch raw kale, 6-7 leaves

  • 2 Tbsps of cottage cheese, or vegan alternative 

  • 1 heaping Tbsp goat cheese, or vegan alternative

  • ½ anchovy fillet

  • 4-5 scallion ends, or 1-2 cloves garlic

  • 1 whole lemon

  • 10 - 12 oz Pipette

  • Grated fresh pecorino, or parmesan  

  • Kosher salt, to taste

  • Olive oil

Optional, Panko Grattato:

  • 2-3 Tbsps olive oil, butter or vegan alternative

  • ½ - ¾ cup panko

  • 2 garlic cloves, grated

  • Pinch of chili flakes

Pan Grattato Instructions

If you plan to make the breadcrumbs (which are optional but SO good & easy), to a pan add 3 Tbsps EVOO & 2 cloves grated garlic. Place over low heat just until garlic is fragrant, 1 minute. Add ½ - ¾ cup panko. Turn up heat and stir constantly, until panko is browned all over. Remove from heat & add salt & chili flakes, to taste.

Sauce Instructions

Start a large pot, 3-4 quarts of water, over a high heat to boil. Wash spinach & kale, if needed. Remove kale leaves from tough stem.

When water boils, add 2 tsps salt. To boiling water, add kale and using tongs or a large spoon, press down to submerge. After 1 minute, add spinach and submerge. After another minute, do not drain pot into the sink — remove spinach from the boiling water using a slotted spoon, tongs or spider strainer, placing blanched greens directly into a blender or food processor.

When all greens are removed from the boiling water, immediately add 10-12 oz pipette, cooking 7-8 minutes until al dente, or follow package instructions for the pasta you’re making.

To the blender with the greens, add 1.5 Tbsps EVOO, 2 Tbsps Cottage Cheese, 1 Tbsp goat cheese, ½ anchovy fillet (more if you like anchovy), 5-6 scallion ends (1-2 garlic cloves if you don’t have). When the pasta is almost done, add 2-3 large spoonfuls of pasta into the blender, along with juice of ½ a lemon and blend until smooth. Salt to taste.

Strain cooked pasta & place back into the empty pot. Place the strainer over the pot & pour about half of the blended sauce into the strainer. Using the back of a large spoon, press down until all the liquid has been strained into the pasta. Set aside what remains of the “pulp” from the cooked greens.

Add the remaining blended sauce to the pasta, top with fresh pecorino, lemon zest, plus panko grattato if you opted to make it.

BONUS DISH: Take what remains of your “pulp” from the cooked greens, add 3-4 Tbsps sour cream, cottage cheese, plain yogurt, labne or vegan alternative. Mix, salt to taste and serve as a take on spinach dip!

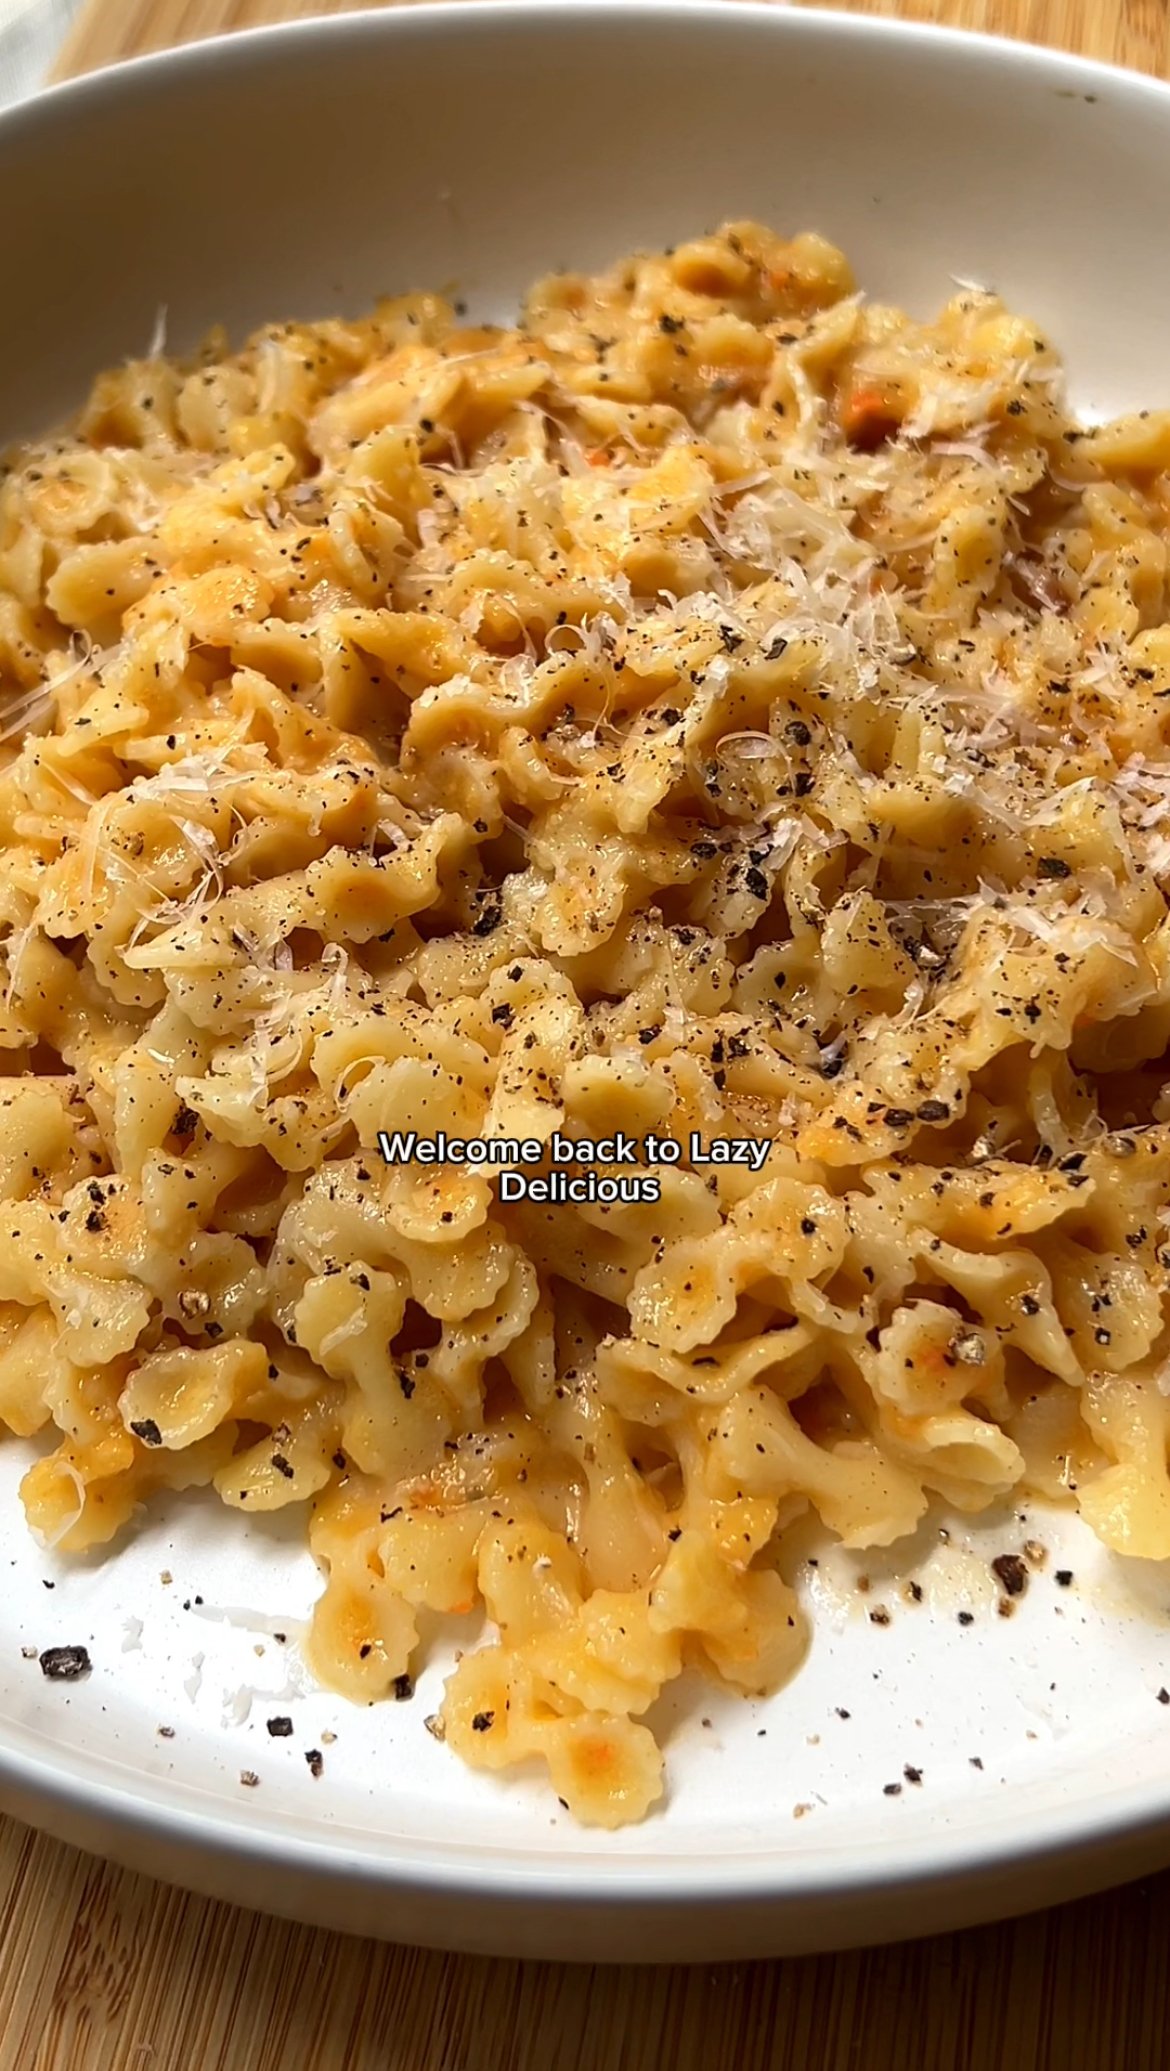
Farfalline in Carrot Miso Sauce

This 7-ingredient recipe (okay, 8!), is hygge for your tastebuds.

It's an umami, veg-packed farfelline that is like a cozy middle ground between soup and pasta. And it's a perfect opportunity to use up carrots that spent a few days too many in the bottom drawer. Trust me when I say, you need to make this.


Farfalline in Carrot Miso Sauce

Serves 2

  • 1 small bunch tri-color carrots, like Cal-Organic

  • 1/4 cup broth (veg, bone, chicken — any kind works), adding more as needed

  • 2 whole garlic cloves

  • 2 Tbsps Shiro Miso, or other miso paste

  • 1-2 Tbsps Butter or vegan alternative

  • Parmigiano-Reggiano or vegan alternative like nutritional yeast

  • 1 cup Farfelline

  • Freshly ground black pepper

  • Kosher salt, to taste

Preheat your oven to 400F and start a pot of water to boil for your pasta.

Rinse + peel your carrots and place on a baking sheet.

Then in the microwave, melt 1 Tbsp of butter or vegan alternative. To your warm butter, mix in 2 Tbsps of Shiro miso, or other miso paste.

Coat your carrots evenly all over with your butter and miso marinade, then top with 1-2 whole crushed garlic cloves. Roast carrots in the oven until carrots are tender all the way through, 10-20 minutes or more, depending on the thickness of your carrots.

Place roasted carrots and whole garlic in a blender or food processor along with 1/4 cup of broth and blend until smooth.

Salt your boiling pasta water, add farfalline and cook until al-dente, 5-6 minutes. In the meantime, add 2-3 spoonfuls of your starchy pasta water to the blended carrot sauce, along with 1/2 cup of loosely packed, freshly grated parmigiano-reggiano or vegan alternative, like nutritional yeast.

Blend to combine, taste and add salt, only if needed.

To your cooked, strained pasta, mix in another Tbsp of butter along with another 1/4-1/2 cup freshly grated parmigiano-reggiano (or vegan alt), lots of freshly ground black pepper and your carrot sauce.

Adjust the thickness of your sauce by adding more bone broth as needed. Finish with cheese and pep, and enjoy!

Olive & Lemon Fazzoletti (Handkerchief Pasta)

Hear me out. Have you ever craved a food that evokes the feeling of a place?

Nothing compares, in my opinion, to pillowy, perfectly cooked fresh tagliatelle… or better yet, fazzoletti.

These squares of fresh pasta turn into blankets of flavor, carrying delicious ingredients into your mouth like a magic carpet.

And perhaps this pasta shape is not for everyone, but for me, in these early days of a so-far rainy summer, I’ve spent my nights laying in bed envisioning myself on the Italian seaside in Luguria - the place where the dish was born.

This dish quells my longing for the feeling of the sun. The bright flavors, warm air & sea-salty wine of the Italian Riviera.

Pre-made, fast cooking fresh lasagna sheets bring this meal together quickly, while still maintaining the feel of restaurant quality. It has BIG flavor (like most of my recipes), and the combination of briney olives & lemon zest bring you straight to the Italian seaside. At least I hope so. Buon’appetito!


Olive & Lemon Fazzoletti (Handkerchief Pasta)

Serves 2-3

  • 6 Rana Lasagne Sheets, 1 package

  • 1 pint container Sungold or orange cherry tomatoes

  • 3-4 finely minced garlic cloves

  • 1/2 cup pitted Italian green olives, preferably Sicilian-style like Castelvetrano

  • 1.5 Tbsp butter

  • 1 whole lemon, washed well for zesting

  • 3 Tbsps fresh ricotta

  • 1.5 Tbsps crushed, diced shelled pistachios

  • Extra virgin olive oil

  • Coarse kosher salt

  • OPTIONAL: red chili flakes for heat

Start a large pot with 2.5 Qt of water to boil, adding 2 Tbsp of salt so that water tastes noticeably salty.

Cut all 6 of the lasagna sheets from the package in half and set aside.

Start by prepping all of your ingredients: finely mince 3-4 garlic cloves. Rinse the entire pint of cherry tomatoes & cut into quarters. Loosely mince olives, until you have about 1/2 cup loosely packed. Loosely chop a handful of shelled pistachios.

To a large flat-bottomed sauté pan, add a big glug of olive oil and place over medium heat. After a minute, add the minced garlic, cooking up to two minutes, until garlic is very fragrant.

Next add all of the cherry tomatoes, cooking down 5-8 minutes until jammy, lowering the heat as needed so as not to burn the garlic.

Finally, add the minced olives and red chili flakes if you want them. Stir to combine. Lower the heat while you prepare the pasta.

Carefully add your half lasagna sheets to the boiling water. Occasionally push the sheets down into the water as they cook because they will want to float to the surface. Let boil about 5-8 minutes or until cooked through (you can cut off a small corner of a sheet to taste).

While the pasta cooks, add three pats of butter, about 1.5 Tbsp, to the pan with the olive & tomato mixture. Add two to three small ladles full of pasta water (don’t add too much liquid!). Stir to combine, creating a silky emulsified sauce.

Taste and salt to taste if needed, but the olives should bring most of the salt and brine.

When the pasta sheets are ready, drop them directly into the pan with the sauce, carefully tossing so as not to break them. If they rip a little, that’s totally okay.

Plate the noodles, spooning extra of the tomato & olive sauce on top. Finish each plate of pasta with a heaping scoop of ricotta, the crushed pistachios and plenty of lemon zest.

Creamy Rigatoni w. Leeks, Sausage & Oregano

This dish is the perfect fall meal. You’ll have to make it and see what I mean…

The light has already started to slant into my apartment differently come mid day, and I’m reaching for a cozy sweater instead of flip flops for my evening walks. When dinner rolls around I look right past the raw greens for something cozy, like this rich, herbaceous rigatoni.

It comes as no surprise to me that this time last year I was publishing the recipe for my Baked Rigatoni Vodka, because any iteration of rigatoni will do when it comes to cold-weather comfort food. This sauce layers umami from browned pork sausage and tomato paste with the savory aromatics of oregano and leeks. Finished off with smooth heavy cream and starchy pasta water, it creates the perfect luscious jacket for al dente pasta. I served mine with a crisp white wine (because it’s not winter yet, okay?!) but I’ll leave the beverage choice to you.


Creamy Rigatoni with Leeks, Sausage and Oregano

Serves 2-4

  • 6 oz ground pork breakfast sausage, from a roll or removed from link casing

  • 1/2 cup thinly sliced leeks, washed, tops removed

  • 1 Tbsp loosely packed fresh or dried oregano

  • 3.5 heaping Tbsps tomato paste

  • 1/4 cup heavy cream

  • 1/4 cup white wine

  • 1/4 cup vegetable broth

  • 1/4 - 3/4 tsp red pepper flakes

  • 1/4 - 1/3 cup starchy pasta water, reserved when straining pasta

  • Coarse kosher salt

  • Fresh grated Parmigiano-Reggiano

  • Freshly grated black pepper

Fill a large pot with 2 Qt of water (8 cups) for your pasta. Place over medium heat while you make the sauce.

Place a 10-12 inch pan with high sides over medium heat (I love doing this in a cast iron). To the pan add a splash of olive oil. Add pork and break it up using a spoon or spatula. Pat down the pieces of pork into a single layer in the bottom of the pan. Let it brown, 3-4 minutes. Add 1/4 tsp of red pepper flakes and 1/4 tsp of salt. Stir, loosening the pork from the bottom of the pan. Then pat back down into a single layer and let brown another 3 minutes. At this point the pork should be brown and crispy. Turn the heat down to medium and add the leeks. Stir and sweat for 1-2 minutes until starting to soften.

Meanwhile, when your pot of water for the pasta is nearly boiling add 3 tsps of coarse kosher salt. Let dissolve.

To the pan with the pork and leeks add 3.5 heaping Tbsps of tomato paste, stir and let cook 1-2 minutes allowing the paste to deepen in color. Turn the heat down to medium-low and deglaze the pan with 1/4 cup of white wine, stir and then allow to simmer gently for a minute or two for the alcohol to cook off.

At this point your pasta water should be boiling. Add rigatoni and cook 10-12 minutes until al dente.

To your sauce, add the 1/4 cup of heavy cream and stir to combine. Let simmer a minute or two, then taste. Add more salt as needed and a few cranks of fresh black pepper. For a spicier sauce add another 1/4 - 1/2 tsp of red chili flakes. To the sauce add your oregano and 1/4 cup of vegetable broth. Let simmer over low heat while pasta cooks.

When the pasta is ready, strain making sure to reserve 1/4 - 1/3 cup of the starchy pasta water. Add cooked pasta to the pan with the sauce. Gently stir, and pour in starchy pasta water until all noodles are thoroughly coated in sauce. You may not need all of the water: add until sauce is loosened to desired consistency.

Serve with fresh Parmigiano-Reggiano on top, a little more oregano and black pepper - and dig in immediately! (Cozy clothes optional but recommended).

Spicy Burst Cherry Tomato Bucatini w. Corn & Burrata

This pasta is like Aglio e Olio got all dressed up for summer vacation…

I’m a sucker for something sensationally simple: perfectly al dente Bucatini generously bathed in spicy, garlicky corn sautéed in butter and cherry tomatoes burst in a little olive oil.

I know … it’s still August and asking you to turn on your ovens, even if to experience the joy of burst cherry tomatoes, may be pushing it, so do the job in a hot sauté pan if need be.

Give the pasta a little time to soak up the delicious flavors of the sauce and serve this room temperature - it’s seriously delightful and perfect for the last of your summer picnics and BBQ’s. Just make sure the pasta is al dente because no one like Soggy-Noodle-Energy. Serve the burrata right on top, on the side, or forego it if you absolutely insist (dairy free friends, I respect your choices).

 
AM2A7376.JPG
 

Spicy Burst Cherry Tomato Bucatini with Corn and Burrata

Serves 2-3

  • 8 oz dry Perciatelli or Bucatini

  • 1 heaping cup cherry tomatoes, 212g

  • 3 crushed garlic cloves

  • 1/2 tsp kosher salt

  • 3-4 Tbsp EVOO

  • Freshly ground black pepper

  • 1 corn cob, 1 cup of corn kernels, 120g

  • 3 garlic cloves, thinly sliced

  • 1 Tbsp butter

  • 1/8-1/4 cup of thinly sliced hot red chilis

  • 1/4 tsp kosher salt

  • OPTIONAL: fresh basil

Preheat your oven to 375F. If you plan to burst your cherry tomatoes in a hot sauté pan, skip this.

Start by crushing three garlic cloves. Rinse your cherry tomatoes and place in a small baking dish (a sheet pan with high sides works, too). To the cherry tomatoes add your crushed garlic cloves, 1/2 tsp kosher salt, 3-4 Tbsp EVOO and a few cranks of freshly ground black pepper. Place in the oven for 15-20 minutes or until cherry tomatoes have burst.

Start a large pot with 2.5 Qt of water to boil, adding 2 Tbsp of salt so that water tastes noticeably salty. Cook Bucatini or Perciatelli until just al dente.

In the meantime, prepare the corn: remove the husk and silk from your ear of corn and cut in half. Stand each half up on it’s flat, cut side, and using a sharp knife, remove the kernels from the ear. Thinly slice 3 garlic cloves and 1/8-1/4 cup of hot red chilis (depending how much heat you like and how hot your pepper is).

In a small sauté pan, place 1 Tbsp butter over med-high heat, occasionally swirling, until butter is very fragrant but not browning - 2-3 minutes. Add the garlic and chili, allowing to cook for a minute or two, making sure not to burn the garlic. Add the corn and sauté, 5 or so mins, until corn is tender but maintains some bite. Add 1/4 tsp salt, stir and then remove from the heat.

Combine the cooked corn with the cherry tomatoes and mix. Taste and adjust seasoning as needed. Strain the cooked pasta, reserving 1/4 cup of the pasta water. Let the noodles cool a minute or two before adding the mixture of burst cherry tomatoes and sautéed corn to the pasta. If it needs a little more “sauce”, add the pasta water and stir vigorously to combine. Serve room temperature, with a creamy ball of burrata on top, on the side or forego the burrata if cheese ain’t your thing! Hollow noodles aren’t slurp-able, but they’re so fun to eat.

Warm Israeli Couscous Salad w. Roasted Cherry Tomatoes

Israeli couscous is an absolute pleasure to eat.

There’s something inherently comforting about eating a hot bowl of soup on a cold day, and that’s precisely how I feel when I eat this warm Israeli couscous salad.  Also known as pearl couscous, this pasta-like couscous is plump and silky, with more surface area to carry flavor than regular couscous. And lest you be misled by my use of the word ‘salad’, there are no leaves involved. Only gluten-full globes of deliciousness with a mouthfeel I can only describe as delightful.

Micole Rondinone Warm Israeli Couscous Salad

In this dish, simplicity is everything. Cherry tomatoes with sea salt and plenty of good olive oil are roasted until bursting, creating a perfectly subtle sauce right in the bottom of the baking dish. Cooked couscous is folded in and finished with shallots caramelized in chili flakes for a savory, spicy finish.  Not sold yet? You can have this dish cooked and ready to serve in as little as 30 minutes. This is one of those dishes that you are going to want to eat right off the spoon.  Be sure to eat it while it’s still warm so you don’t miss out on the joy of cherry tomatoes bursting unexpectedly in your mouth.

Micole Rondinone Warm Israeli Couscous Salad

Warm Israeli Couscous Salad

Serves 4-6

  • 1 cup Israeli (pearl) couscous (like Brad’s Organic or Trader Joes)

  • 1 box cherry tomatoes

  • 1 large shallot, or 2 small

  • Extra Virgin Olive Oil

  • Dried red pepper flakes

  • Sea Salt

  • OPTIONAL: Manchego, for shaving on top

Preheat oven to 375. Wash tomatoes and put them in a baking dish with high sides. Make sure that the tomatoes are in a single layer. Pour lots of good olive oil on top and sprinkle generously with sea salt. The olive oil should cover the bottom of the baking dish. Combined with the juice from the tomatoes, it will comprise the sauce for your couscous, so don’t hesitate to be a bit heavy handed.

Once the oven is preheated, put the tomatoes in the oven and set a timer for 15 minutes. Now start your couscous in a small pot, and cook according to product specific instructions. For Bob’s Red Mill Pearl Couscous, add 1 ½ cups water to the pot with a sprinkle of sea salt. Bring to a boil and then add 1 cup couscous. Reduce to a simmer and mix before covering. Cook covered until water is absorbed, about 10 or so minutes. Remove from the heat, mix gently, cover and set aside.

While the tomatoes are in the oven, cut 1 large shallot into rounds (or use 2 small shallots). The more caramelized shallots, the merrier! Heat 2 tbsps or so of olive oil in a medium sauté pan over medium heat. Add the shallots when the olive oil starts to shimmer. Turn down the heat and let shallots cook until they are starting to become soft and translucent, about 2 minutes. Add ½ tsp red chili flakes and a sprinkle of sea salt to the pan. Let cook over very low heat another 8-10 mins. When you taste your oil, it should have the heat from the chili flakes. Turn the heat off.

Once the tomatoes have been in the oven 15 minutes, take them out, give them a mix and then stick back in the oven for 10 more minutes, or until tomatoes are very soft with wrinkled skin. Once done, let cool a few minutes and then pour cooked couscous into the baking dish with the cherry tomatoes. Pour in shallots with chili oil and gently fold everything together. Taste for salt and add more as needed.

Serve warm. Top with a bit of shaved manchego for some extra pizzazz. This dish also tastes great after a day or two in the fridge, as the couscous continues to soak up all the delicious flavor.

The Simplest Sauce Ever

I grew up eating this sauce. My mom always made it from scratch, imagining it just a little differently each time. I’d watch while she threw in a bit of this and a bit of that, until it tasted just right. While pasta can provide a canvas of opportunity for creativity, there’s something to be said for taking it back to basics. To this day, the sauce always starts with a few things: whole peeled tomatoes crushed by hand (dangerously threatening any garment of clothes you’re wearing), garlic, olive oil, red pepper flakes and capers. It really is the simplest sauce ever, and rarely disappoints. This is an anti-recipe recipe: there are no measurements, and few specifics. Have fun, trust your intuition and remember, you can make this pasta YOURS: add whatever calls to you.

 
Micole Rondinone Simple Sauce
 

The Simplest Sauce Ever

Serves 3-4

  • 1 can Italian whole peeled tomatoes, crushed by hand (or whole fresh tomatoes, if they are in season)

  • Extra virgin olive oil

  • Salt to taste

  • Fresh chopped garlic

  • Red pepper flakes to taste

  • Capers and a splash of the liquid 

  • OPTIONAL: fresh basil

Start by roughly chopping your garlic cloves. For a whole can of tomatoes, I’d use 2-3 cloves of garlic, but adjust to your own tastes and factor in the size of your garlic cloves.

Start a sauce pan or pot over med heat, adding olive oil once the pan is hot. Next, add your garlic and sauté until fragrant, a minute or so. Then add your crushed whole peeled tomatoes to the pot and stir. Add an extra splash of olive oil, and capers with some of the briny liquid.

Lower the heat and cook the sauce down 15 or so minutes, allowing flavor to deepen. Add salt and red pepper flakes to taste only after reducing. If you have fresh basil, chiffonade and add at the last minute before serving.

Serve over al dente pasta, or use for any dish that calls for a simple tomato sauce (i.e., Lasagna, Eggplant or Chicken Parmesan). If saving to use later, let cool to room temperature before packing up and storing in your fridge or freezer.

Pistachio Pesto

Pesto is a thing of magic.

From the Italian “pestare”, or to crush, pesto starts out as 6 simple ingredients and turns into a bright, rich, savory sauce that can serve you on your culinary adventures in myriad ways.  Pesto can be used, of course, on pasta, but also as a marinade for meat, in dressings, as the base for a delicious pizza, spread on to your favorite sandwich, on top of homemade hummus, or, as I love to do when I make my Pesto Meatballs, folded into ground beef. 

Micole Rondinone Pesto Pistachio

Much like other sauces with minimal ingredients (Carbonara and Cacio e Pepe come to mind), the quality of each ingredient is of the utmost importance.  For this reason, pesto is best when made from fresh basil (keep an eye out at your local farmer’s market).  In North America, unfortunately this limits our pesto season to the warmer months, but making extra at the end of the summer and freezing it for year round enjoyment is always a great idea.  If you grow it yourself or have access to fresh basil year round, even better.  Just know that your pesto will taste best when the basil is at peak freshness and flavor.  And let’s not forget that the quality of your olive oil and Parmigiano-Reggiano are equally as important.  Don't skimp!  These two ingredients give the pesto it’s richness; the olive oil being the glue that carries it all, and the cheese what gives pesto it’s deep umami flavor.  Getting real-deal Parmigiano-Reggiano is a non-negotiable here.

Here’s where this recipe goes against the grain: instead of pine nuts, pistachios are used.  Not only are pine nuts wildly expensive, I've found that they are just not the end all be all when it comes to making pesto.  In the kitchen I always say, why not experiment?  I once used pistachios when making my Vegan Roasted Red Pepper Pesto, simply because I didn't have pine nuts on hand, and the result was fantastic.  Pistachios are rich and flavorful, and nothing makes them less capable of making an incredible pesto.  In fact, they make a wonderful nutty alternative, and bring a whole new dynamic to this classic sauce.  Once you have all your ingredients, it only takes 10 minutes or less to go to pesto heaven, so what are you waiting for?

Micole Rondinone Pistachio Pesto

Pistachio Pesto

Renders roughly 1 cup concentrated pesto

  • 2 cups loosely packed fresh basil

  • 1/4 cup high quality extra virgin olive oil

  • 1 large clove fresh garlic, pressed or finely diced

  • 1/4 tsp sea salt (can add salt after if need be)

  • 1/2 cup shelled raw pistachios (unsalted)

  • 1/4 cup loosely diced pieces of pargmigiano-reggiano

  • Optional: Juice of half a lemon

Unless pre-washed, wash basil and remove leaves from the large stems.  If not using a garlic press for the garlic, you can finely dice your garlic or mash it up a bit in a mortar and pestle.  Shave off chunks of parmigiano-reggiano from your larger block, loosely filling 1/4 cup.  Then combine all ingredients except sea salt in a food processor (or blender) and blend, stopping occasionally to scrape down the sides. 

Once the pesto is mostly smooth, but still retains some texture, add salt to taste.  Depending how salty your parmigiano is, you may need either more or less than 1/4 tsp of sea salt.  If you find you need more olive oil, add a little more olive oil and blend again.  Love garlic? Add a second clove.  Lemon is optional but adds a nice subtle tartness.  When it's all done, go have fun and get creative!  Your pesto will last in the fridge for at least a week, or you can freeze it for enjoyment later.  To defrost, just let pesto sit at room temperature.

Fried Eggplant Parmesan Stacks (GF)

If you think eggplant parmesan is a difficult dish to make…

you’re wrong. The simplicity of this dish is, in my opinion, what makes it so great. Eggplant rounds are shallow fried, which brings out that luscious texture that a well-cooked eggplant unlocks. This recipe does not use bread crumbs, which makes it less involved than some other recipes (and gluten free if you’re into that sort of thing). Once fried, the eggplant is stacked (as the name precludes) with layers of mozzarella, placed under the broiler and left to get super melty. Finish with my Simplest Sauce Ever, which is the perfect red-sauce compliment to this rich dish. Serve it all with some perfectly cooked al dente pasta and you’re good to go. Now just imagine you’re dining al fresco nella piazze di Roma.

 
AM2A0710.jpg
 

Fried Eggplant Parmesan Stacks (GF)

Serves 2

  • 1 med eggplant, 8+ inches in diameter, ¾ lb of rounds ¼ in thick (approx 12 rounds, 6 per serving)

  • ½ cup neutral oil

  • 4oz salted mozzarella, cut into thin rounds (not fresh that comes in water but this kind

  • Coarse kosher salt

  • Freshly ground black pepper

  • ½ cup Simplest Sauce Ever, more if you’re serving with pasta

  • Freshly grated parmigiano reggiano

  • OPTIONAL: Fresh basil, any variety al dente pasta

Start making your Simplest Sauce Ever if you haven’t prepared it already. Once that’s on the stove and simmering, rinse your eggplant and cut into rounds, skin on. Lay the rounds out into a single layer on a paper towel or kitchen towel. Sprinkle one side with salt to pull out some of the bitterness and excess moisture. After 10-15 minutes, press down on the eggplant with a clean towel to thoroughly remove all the excess moisture. 

Cut your rounds of salted mozzarella and set aside on top of a clean kitchen towel or paper towel. We want to remove a bit of the excess moisture from the mozzarella. Place in a cool part of your kitchen, or back in the fridge.

To shallow fry the eggplant, start by heating cup of neutral oil in a cast iron or stainless pan over med-high heat. When you see the oil shimmering, make sure your eggplant is thoroughly dry before adding to the pan. Shallow fry in batches, 2-3 pieces at a time making sure not to overcrowd the pan, until crispy and golden on both sides. Too much eggplant in the pan at once will cause the temperature of your oil to drop, and lead to soggy, oily eggplant, rather than crispy.

As you remove the fried pieces of eggplant from the pan, lay them on a paper towel to drain excess oil and sprinkle immediately with a little coarse salt while hot. If you want to serve this with pasta, start boiling some water and salt it generously.

When all the eggplant has been fried, turn your oven on to the low broil setting and grab your mozzarella slices.

In a baking dish with sides, stack 5-6 pieces of eggplant, largest pieces towards the bottom, alternating with rounds of mozzarella in between. For the higher tiers of eggplant, if whole rounds of mozzarella are too large, tear the mozzarella into smaller pieces and add just enough to cover the eggplant, letting the cheese stick out a bit at the sides to achieve that melt-down-the-sides greatness. Once you’ve used all your eggplant, cover the baking dish with a piece of foil, making sure to tent it up a bit so it doesn’t stick to the top layer of cheese, and put in the oven for 10 minutes.

At this point, add pasta to boiling water and cook until al dente. Start to warm your simple sauce on the stove top over a low-medium heat.

After 10 minutes, the mozzarella should have started to visibly melt. At that point, remove the tin foil, turn the oven on to high broil, and put back for another 3-5 minutes, or until the top layer of mozzarella is golden brown and other layers of mozzarella are super melty.

Carefully remove from oven and transfer to a plate. Top with a few spoonfuls of your simple sauce and finish with a grind of black pepper, freshly grated parmigiano reggiano and fresh basil, if you have! Serve alongside your al dente pasta tossed in simple sauce.

Baked Rigatoni Vodka

Brisk late-August evenings have my heart and belly at odds…

Every year I fear the feeling of that first fall chill. I impulsively frown at the thought of jackets and snow. While friends are celebrating the return of their favorite cozy sweaters and pumpkiny-things, I’ll be crying tears of winter contempt into this baked rigatoni vodka. Savory pancetta, a luscious vodka sauce and the addition of three cheeses create are one fierce emotional support meal, though. As long as I can bring it everywhere with me I might be okay.

AM2A6417.jpg

Baked Rigatoni Vodka

Serves up to 6

  • ¾ cup pancetta, or 2-3 pcs of bacon with excess fat removed (simply omit if you are vegetarian)

  • 1 medium white onion, 1 ¼ cup diced

  • 7 baby bella mushrooms, stems removed, cleaned and thinly sliced, 1 heaping cup 

  • 4-5 garlic cloves, finely minced, 1 ½ Tbsp

  • ½ tsp Kosher salt

  • ½ tsp Red chili flakes

  • 4 Tbsps tomato paste

  • 1 whole 14.5 oz can tomato puree or crushed tomatoes

  • 4 oz vodka

  • ⅛ cup fresh ricotta

  • ¼ cup creme fraiche

  • ¼ cup fresh grated Parmigiano

  • ½ cup heavy cream

  • Freshly grated black pepper

  • 1 box rigatoni (sub GF pasta if necessary)

  • Fresh mozzarella, 6-7 thin slices

  • OPTIONAL PARMESAN GARLIC CRUST: 1/2 cup fresh grated Parmigiano, 3 garlic cloves minced, red chili flakes, freshly grated black pepper

First, finely mince 1 ½ Tbsp of raw garlic (4-5 cloves). Dice 1 heaping cup of white onions. Clean and remove the stems from 6-7 mushrooms and cut into thin slices.

Heat a large saucepan with high sides over medium heat. When pan is hot, add pancetta. If you don’t have pancetta, use bacon with some of the excess fat removed. Cook until a majority of the pancetta is golden and crispy, being sure not to burn it.

Turn the heat off and with a slotted spoon, remove pancetta from the pan, letting any fat drip through before putting in a small bowl. Set aside. If you are using bacon, remove from the pan and set aside on a paper towel to drain the excess fat.

Pour out most of the fat that reminds in the pan, leaving just enough to coat the bottom. Place the pan back over a medium heat and once hot, add diced onions. When they start to sweat, scrape up any brown bits from the bottom of the pan and soften, 3-4 minutes, turning the heat down if the onions start to get too much color or if the pan is looking dry.

Then add sliced mushrooms to the pan along with ½ teaspoon of coarse kosher salt. Mix and cook another 2 mins. Next, add minced garlic to the pan along with ½ teaspoon red chili flakes, stirring occasionally to make sure garlic doesn’t burn. After another 2 mins, when garlic is fragrant, add tomato paste. After a minute or two, over a low heat, deglaze the pan with 4 oz vodka. Let the alcohol cook off, 5 or so minutes.

Start your water for pasta. Once the water has reached a simmer, salt to taste like the sea. 

Add your canned tomato puree or crushed tomatoes to the pan. You can also use whole peeled tomatoes and simply crush by hand, or if you prefer a smoother sauce, puree in a blender/food processor. Bring the sauce to a rapid simmer, and then turn down the heat letting it cook down to bring the flavors together, 10-15 minutes.

Once your pasta water is boiling, add the pasta and cook exactly to al dente. The pasta cooks a few minutes in the oven at the end, so if it gets overcooked here, it will be mushy when you serve it.

In the meantime, in a small bowl, combine 1/8 cup ricotta, 1/4 cup creme fraiche and 1/4 cup freshly grated Parmigiano. Add a few cranks of freshly ground black pepper and mix. This will be coating your noodles before you add the vodka sauce.

Next, go ahead and add your cooked pancetta back to the sauce. If you used bacon, dice it and add.

Then add heavy cream and mix, until you reach desired level of creaminess, up to ½ cup. If you prefer a less creamy sauce, start with 1/4 cup. Mix to incorporate. Let cook together another 5 mins over medium low heat.

Then do a final seasoning check - add freshly ground black pepper, and more salt and chili pepper if you like. I usually add more of both here. When pasta is just al dente, strain, reserving a little of the starchy pasta liquid. 

Put pasta into a baking dish, like a 9x13 with at least 2 ½ inches of depth. If your baking dish smaller, you may want to mix your pasta with the sauces in the pot you boiled it in. To the pasta, add the three cheese mixture, and gently stir in order to evenly coat. 

Turn your oven onto the high broil setting.

Spoon the vodka sauce over the pasta and gently fold together again, being careful not to break pasta. If you prefer your food very hot when you eat, you may want to bring your vodka sauce to a simmer before spooning it over the pasta.

Once pasta has been evenly coated in vodka sauce, add a few splashes of pasta water to loosen. It should create a little creamy liquid in the bottom of the baking dish.

Cut mozzarella into 6 or 7 thin slices, and then tear apart and put on top of pasta.

Place baking dish in the oven just until the mozzarella is golden brown and melted, 3-5 minutes. Keep an eye and don’t walk away because some broilers are very hot, and you don’t want to burn the cheese. I usually check after 3 minutes, and add another 2 minutes if it’s not browned yet.

When the mozzarella is ready, remove baking dish from oven and set aside to let cool for a minute or two.

OPTIONAL - FRIED GARLIC & PARMESAN CRUST: For a final touch, while your pasta cools, finely mince 3 cloves of garlic. In a non stick pan with oil, gently fry the garlic over low heat, mixing constantly until a light golden color. Then remove from the heat and add to a small bowl to cool. In another bowl, grate 1/2 cup of fresh Parmigiano. Once the garlic is cool, mix with grated parmesan, a little red chili flake for some heat and a crank of black pepper. Sprinkle over pasta just before digging in.