Cardamom & Hazelnut Banana Bread

Thank you, Kristen Miglore

Kristen is a founding editor at Food52. She is also the share-er of my favorite banana bread recipe - a recipe her mom discovered in a community cookbook. As the best recipes are, it seems this one is meant to be passed on and tweaked in all the amazing ways banana bread can be, with a change of nut here, and a dash of something unexpected here.

In this version of Kristen’s banana bread I use hazelnuts and a hint of ground cardamom to make a banana bread that’s just extra-extra special in all the right ways. Of course I hope you will try this recipe, as well as Kristen’s OG version here, which is an undeniably good classic. I’ve also made this using Bob’s Red Mill Gluten Free AP Flour and it came out GREAT.


Cardamom & Hazelnut Banana Bread

Makes one 9”x5” loaf

  • 1/2 cup (226 grams) unsalted butter, melted, plus more for buttering the pans

  • 3 very ripe large bananas (frozen and thawed work great)

  • .87 cups (175 grams) granulated sugar

  • 2 large eggs

  • 1 1/4 cups (157.50 grams) all-purpose flour, or Gluten Free Baking Flour

  • 1/2 teaspoon fine sea salt

  • 1 teaspoon baking soda

  • 1/2 cup (113 grams) finely chopped hazelnuts

  • 1/4-1/2 tsp ground cardamom, depending how much cardamom you want to come through

  • Turbinado or other sugar for sprinkling on top (optional)

Preheat your oven to 350F.

Mash your ripe bananas in a medium sized bowl using a large fork. Once mashed add butter, sugar and eggs. Mix until well-combined.

In another medium sized bowl add your dry ingredients: flour, salt, ground cardamom and baking soda. In lieu of sifting, whisk all the dry ingredients together to make sure there are no lumps, and that they are thoroughly combined.

Add dry ingredients to the bowl with the wet banana mixture. Stir until the flour is nearly all the way combined with the wet ingredients.n Add your chopped hazelnuts and finish stirring until no flour is visible, making sure to scrape down bottom and sides of the bowl.

Butter the sides and bottom of a 9”x5” inch loaf pan. Before putting in the oven, add this special, but optional, touch that I love from Kristen’s recipe - sprinkle the top with a thin layer of turbinado or other raw sugar.

Bake for about 35-45 minutes, until a cake tester, paring knife or toothpick can be inserted into the center and come out with no visibly wet batter (as Kristen says moist crumbs clinging are okay. If you use a shallower pan, bake for less time.

Once removed from the oven, let the loaf cool, 15-30 minutes, then unmold and wrap tightly in parchment and then a layer of tin foil or beeswax food wrap. Keep covered at room temperature.

Tangy Carrot Salsa

Fight the battle against carrots that are shriveling in your fridge once & for all…

In my series ‘What To Do With the Leftover Sh*t In My Fridge’ I find easy culinary solutions for the pesky ingredients that somehow always find their way to the bottom (or back) of your fridge, only to see the day of light again once they’re past their prime.

This time around, the focus of my efforts was carrots and it took some time before I landed on the thing to save them from imminent death: carrot salsa. You didn’t misunderstand me - this 4 ingredient condiment is the thing you’ll be putting on your fish tacos & salads all summer long.


Tangy Carrot Salsa

  • 1 cup of thin carrot rounds from clean, peeled carrots

  • 1/4 cup diced red onion, large dice

  • 1/2 cup loosely packed cilantro, leaves and stems

  • 3 Tbsps of fresh lime juice, from 2-3 limes

  • Kosher salt

  • OPTIONAL: rounds of hot pepper of choice (jalapeńo, habanero, birds eye chili), Cubed avocado

If you are using carrots that have been lying around in your fridge for a while, you’ll want to revive them first by soaking them for a few minutes in an ice bath comprised of ice and water. This will give them back a bit of the moisture they lost while sitting in your fridge.
Clean and peel the carrots, and then cut into thin rounds (roughly 1/4-1/2 inch thick). A mandolin helps make quick work of this, but if you don’t have one, don’t fret — cut them by hand and don’t worry so much about your knife skills. This is a rough chopped salsa, after all. Do a large dice on a bit of red onion, about 1/4 cup. Finally, if you want a spicy salsa, cut a few rounds of your hot pepper of choice.

In the bowl of a food processor combine all ingredients with your squeezed lime juice. Pulse for about 15-30 seconds, just until you’ve created a rough chop. Don’t go too long or you will puree the mixture!

Empty into a bowl and season, adding a pinch of kosher salt and more lime if you like. You could even add some cubed avocado to this salsa before serving to give it texture and flavor contrast.

Enjoy with any meal you’d normally add salsa to (tacos, nachos, quesadillas, salads, grain bowls, toast, eggs!).


Chili & Cilantro Fairytale Eggplant w. Labneh

Fairy Tale eggplant are a summer delight.

If you love eggplant but avoid large, globe eggplant, which can be bitter and require time & love to bring out their tender side, then this tiny eggplant cousin is for you.

Tender and easy to cook with a deliciously mild flavor, these eggplant have been coming home with me week after week from the farmer’s market. All they need is a little oil and 3-5 minutes cut side down in a hot cast iron. Slightly larger ones may need another few minutes on the other side, and then they’re ready to be served any way you like. This dish is definitely one where you can flex your creativity and choose your own adventure: I like mine served warm over labneh, with a drizzle of chili oil, one final dash of salt and fresh cilantro.


Chili & Cilantro Fairytale Eggplant with Labneh

Serves 2

  • 10-12 Fairy Tale Eggplant

  • Neutral oil, like Avocado, Safflower or Sunflower

  • Kosher salt

  • Freshly ground black pepper

  • 2-3 heaping spoonfuls labneh

  • Chili oil, like Fly by Jing or Chili Onion Crunch from Trader Joe’s

  • Fresh cilantro or other fresh herb

Heat a well seasoned cast iron over med-high heat.

In the meantime, wash and cut Fairy Tale eggplant in half lengthwise. Drizzle the cut side with neutral oil, sprinkle with salt and freshly ground black pepper.

When the cast iron is hot, place the eggplant cut side down until they’re golden and seared, 3-5 minutes. Larger eggplant may need another few minutes on the other side to become tender throughout. Remove eggplant from the cast iron and let cool a few minutes.

Plate over a few heaping spoonfuls of labneh. Drizzle with your favorite condiment like chili oil or zhug. Finish with fresh cilantro and/or other fresh herbs. Enjoy!

Sweet Summer Corn & Gouda Cornbread

The number one reason I can’t stop making this cornbread?

… the moist pockets of buttery corn & gouda cheese. Corn bread can sometimes be a bit dry, so when writing this recipe I heeded some useful wisdom I stumbled upon while doing research — adding AP flour to cornbread makes it a lot more moist, with a slightly more cake-like consistency.

And yeah, I’m a huge fan: the soft texture makes it a pleasure to eat both warm and cold - right out of the fridge. A perfect way to use up ears of corn that didn’t make it to the grill… or just an excuse to make cornbread? I’ll let you decide.

AM2A7479.JPG

Sweet Summer Corn and Gouda Cornbread

Serves 8+

  • 1 cup all-purpose flour

  • ½ cup Indian Head Yellow Corn Meal

  • 1/3 cup turbinado sugar

  • 1 teaspoon salt

  • 2 ½ teaspoons baking powder

  • ¼ cup +2 tablespoons oil

  • 1/4 cup milk

  • 1/4 cup labne + 1/2 Tbsp milk

  • 2 eggs

  • 1 ear corn, 120g corn kernels

  • 1 Tbsp butter, 13g

  • 1/2 cup Grated gouda + a little extra to melt on top at the end (grate while cheese is cold as gouda is quite soft)

Preheat oven to 375.

Combine dry ingredients (flour, sugar, salt and baking powder) in a mixing bowl. Use a whisk to combine.

Remove husk and silk from your ear of corn and cut in half. Stand each half up on it’s flat, cut side, and using a sharp knife, remove the kernels from the ear. In a small saute pan, place 1 Tbsp butter over med-high heat, occasionally swirling, until butter is very fragrant but not browning - 2-3 minutes. Add the corn and sauté, 5 or so mins, until corn is tender but maintains some bite. Add 1/4 tsp salt, stir and then remove from the heat. Let cool while you combine the wet ingredients.

In a separate mixing bowl, combine oil, eggs, milk and the mixture of 1/4 cup labne + 1/2 Tbsp milk, whisked together to loosen the labne.

Finally, to the wet ingredients add the cooled corn and 1/2 cup of grated gouda.

Using a balloon whisk mix together the wet and dry ingredients until the batter is uniform — it will be slightly lumpy. Avoid over whisking the batter, but scrape down the sides and bottom to make sure there are no dry pockets of flour. Pour the batter into a greased 5” x 9” loaf pan and bake for 30 minutes.

After 30 minutes, remove the cornbread from the oven. Insert a cake tester, skewer or knife and make sure it comes out dry.

Switch the oven to the high broil setting. Grate a little extra gouda cheese on top of the corn bread and place under the broiler to melt the cheese — just 2-3 minutes. Remove from the oven and let come to room temperature. Run a knife around the edge of the loaf pan to loosen, flip to remove and serve warm or refrigerate until you’re ready to enjoy.

Maple Citrus Plum Jam w. Ginger

Tangy, seasonal & sweet…

This plum jam recipe was born out of a collaboration with Fraiche Kiosk for their 2021 Seasonal Fruits & Vegetables Calendar. In July, plums are exquisite and now is the time to take advantage, so go on — get jammin’ [was that a dad joke?].

Print and digital copies of the Seasonal Calendar are still available here! 10% of proceeds from sales are donated to Rethink Food, a nonprofit working to reduce food insecurity in the New York area. Each month features seasonal ingredients, monthly recipes (including mine!) & Fraîche’s suggestions for a more environmentally friendly life.

AM2A2596.JPG

Maple Citrus Plum Jam with Ginger

  • 2 lbs ripe plums, Empress or other variety

  • ½ cup of maple sugar, or natural sweetener of your choice

  • ½ cup water

  • Juice of ½ - 1 whole lemon or lime, to taste

  • ½ - 1 tsp raw grated ginger, to taste

Thoroughly rinse your plums, then cut in half and remove pits. Make sure there are no small pieces stuck to the plum flesh. Cut plum halves into quarters and add to a med-large sauce pot. Add water and sugar or other sweetener to the plums, and mix. Start the mixture over a medium heat. When it starts to simmer, turn down to a low heat and cook, stirring very often to make sure the sugars don’t burn on the bottom of the pot.

Cook about 45 minutes - 1 hour, or longer, until jam has reached desired thick consistency. Test thickness using an ice cold spoon from the freezer — when the jam sets on the cold spoon it reflects how thick the jam will be once cooled. At this point add fresh squeeze citrus juice , strained of any solids, and raw grated ginger to taste. Mix thoroughly. Let cool before storing in a jar in the fridge.


Honey & Za'atar Smokey Roasted Pistachios

Addictive and very snack-able.

These pistachios have found themselves a consistent presence in my fridge. I reach for them as a solo snack, tossed into nearly every salad I make, on top of morning kefir bowls and also crowning a soon-to-arrive recipe for Rose Cardamom Pudding.

 
Micole Rondinone Honey & Za'atar Pistachios
 

Honey & Za'atar Smokey Roasted Pistachios

1 Serving 

  • 1 cup raw shelled pistachios

  • 1/4 tsp smoked paprika

  • 1/2 tsp za’atar

  • Kosher salt

  • Honey

  • OPTIONAL: zest of a clean lime

Preheat your oven to 300 F

Put some parchment down on a half sheet baking tray.

Add 1 cup of raw shelled (or unshelled) pistachios to the parchment. Drizzle with honey and then sprinkle with 1/4 tsp smoked paprika, 1/2 tsp za’atar and a good pinch of kosher salt.

Use a utensil to give the pistachios a mix before flattening them into a single layer.

Place in the oven for 15-20 minutes. They should be fragrant!

You can finish them with a bit of lime zest if you want! Serve immediately warm, or bring to room temperature before storing in the fridge up to 2 weeks.

Warm Roasted Vegetable Goat Cheese & Romesco Sandwich

Don’t believe anyone who says plants can’t taste frigging amazing.

I’ll avoid using profanity here, but this is a topic I feel strongly about: when you treat vegetables the right way - impart them with lots of flavor and layer textures - they become something else entirely. This sandwich builds on the classic combination of beets and goat cheese, adding crispy fennel, sweet fig balsamic and Shab's Sauce Red Pepper Romesco.

In typical The Kitchen fashion, it's a flavor party: it’s creamy, crunchy, garlicky, savory, earthy, sweet and smokey. Make sure you roast plenty of beets and save the leftovers to use throughout the week - for these sandwiches, in bowls, salads, over labne with za’atar as a snack.

We will also be making the most of our beets and avoiding food waste by including the beet greens in our sandwich once they’ve been sauteed with plenty of garlic first, of course.

 
Micole Rondinone Beet Sandwich
 

Warm Roasted Vegetable Goat Cheese & Romesco Sandwich

1 SANDWICH

  • 2 slices of good bread, like Amy’s Rye Sourdough

  • 1 large bunch beets and it’s greens, and for this recipe 2 small roasted beets, cut into thin rounds and large handful beet greens

  • 1-2 tbsps of goat cheese

  • 3-4 flesh cloves of garlic

  • Roughly 1/2 cup thinly sliced fennel bulb and a few leafy fronds

  • Shab’s Sauce Roasted Red Pepper Romesco

  • Fig Balsamic

  • Freshly ground black pepper

  • Kosher

  • Extra virgin olive oil

If you can find pre-roasted, peeled beets feel free to use those. Otherwise, if you are roasting your beets, start here. Preheat your oven to 400F. In the meantime, cut the beets from their large stalks and greens, setting those aside. Rinse the beets thoroughly of any excess dirt, and then trim both the top and bottom so they are flat on both ends. Peel the beets, as this makes them faster to use up once roasted.

Place peeled beets in a small baking dish and drizzle with extra virgin olive oil. Sprinkle with a good pinch of kosher salt, some freshly ground black pepper and toss to coat. Add just shy of 1/4 cup water to the baking dish, cover and put in the oven for up to 60 mins, or until completely fork tender but not mushy. I love checking my vegetables using a cake tester.

While the beets are in the oven, cut beet greens from the thick, tough stalks. Thoroughly rinse them and then spin dry in a salad spinner or gently dry in a clean kitchen / paper towel. Chop 3-4 fresh garlic cloves and set aside. We will use a large handful of the greens per 1 sandwich. Wrap any remaining greens in a dry, clean towel and place in the fridge.

Take your goat cheese out so it comes to room temperature and becomes easier to spread.

Trim off the bottom end of the white fennel bulb. Then using a mandolin or a sharp knife, cut roughly 1/2 cup of very thin rounds. Remove a few of the fuzzy fronds to add to the sandwich as well. Set aside. (Use the rest of the fennel during the week for this simple salad.)

When the beets are ready, remove from the oven and carefully lift the foil, being careful of the hot steam. Leave the beets in the baking dish uncovered to cool.

In a pan, heat olive oil until shimmering and hot. Add garlic and allow to cook in the oil for 30 seconds. Then add clean beet greens, stir to coat, adding a splash more olive oil if you want. Cook a few minutes until greens are wilted but still bright green. Move all garlic and greens to a small plate. Leave the pan on the heat to crisp your bread. Raise to a medium high heat.

Brush your two pieces of bread with oil or butter on one side. Add to the same pan the greens were in and over a high heat allow to get very crispy and golden. Add butter or oil to the side facing up and then add back to the pan with that side facing down, allowing it to also get golden and crispy.

When the bread is done, remove pan from the heat. Add 1 tbsp of plain goat cheese to both pieces of bread and spread thin. To one piece of bread, add 1 tsp of Shab’s Sauce Roasted Red Pepper Romesco and spread, mixing it into the goat cheese. On top of that, place thinly sliced rounds of roasted beet - roughly 2 small beets or 1 large per sandwich.

Add thinly sliced fennel and fennel fronds. Carefully drizzle with a bit of fig balsamic. Top with the second piece of bread, cut in half using a sharp knife and serve immediately!

Plant Based Roasted Sweet Potato Queso-Style Dip w. Caramelized Onions

Seriously, who doesn’t love a dip?!

I’m obsessed with female owned nut milk brand Three Trees. When I worked with them last year I fell in love with their incredible, creamy milks and instantly knew it would make the perfect base for a plant based dip. I’m also going to recommend some of my favorite tortilla chips from Xochitl for their ratio of thinness to dip-carrying-capacity.

Yes, this is a plant based “queso-style” dip and I put that in quotations in case you’re someone who does not believe in veganizing: I would hate for you to miss out on this dip for that reason. It’s just a great dip trying to be great! Made with simple plants and lots of flavor, we start by roasting the sweet potato and sautéing onions. This may seem like an extra step but don’t skip it, please. The name of the game to great food is LAYERING FLAVOR. When we roast and sauté our ingredients, we impart them with flavor before we’ve even blended and seasoned our dip. You can do this up to 2 days in advance, and then blend up later. Come over and make the recipe with me here!

 
AM2A7775.JPG
 

Plant Based Roasted Sweet Potato Queso-Style Dip with Caramelized Onions

Serves 6-8

  • 2 x medium sweet potatoes, 1 lb total

  • 1 medium yellow or Spanish onion

  • 1 Tbsp unsalted butter

  • 1 small white onion

  • 1/2 tsp cayennne powder

  • 1/2 tsp cumin powder

  • 1/2 tsp smoked paprika

  • 1/2 tsp chili powder

  • 2 cups Three Trees original almond milk

  • 2 Tbsp nutritional yeast

  • 4 Tbsps white wine or apple cider vinegar

  • 2 tsp chipotle Cholula, and more for serving

  • Fresh cilantro

  • 1 lime

  • Kosher salt

  • Coconut oil

  • Olive oil

  • OPTIONAL: 1.5 tsps corn starch for thickening

  • Xochitl Organic Blue Corn Tortilla Chips

Preheat oven to 380F degrees.

Peel and cut sweet potatoes into rounds. Add to a mixing bowl with 1.5 Tbsp coconut oil and a sprinkle of kosher salt. Toss to evenly coat.

Lay sweet potatoes on a baking sheet in a single layer and bake for 30 mins or until golden on both sides, flipping halfway through. When finished, cut rounds down loosely into quarters for easier blending.

In the meantime, let’s make caramelized onions: take your medium yellow or Spanish onion and remove the top and bottom root end so that it’s flat on both ends. Peel off outer skin. Cut onion in half, top to bottom, and then slice into thin, half moons. Add all the onions to a large pan with a splash of olive oil. Cook 15-20 mins over low heat, stirring frequently. If the pan gets dry, add a splash of water and mix. If the onions are cooking too fast and burning, turn the heat down.

When the onions are significantly cooked down, add 1 Tbsp butter to the pan and continue to cook over low heat until they are a deep golden color. Add a sprinkle of kosher salt. Remove from heat and set aside.

In a pot with a splash of olive oil, sauté 1  cup of loosely diced white onion. After a few minutes when the onion has started to soften, add a sprinkle of salt and 1/2 tsp cayenne, cumin powder, smoked paprika and chili powder. Mix and cook together another minute or so.

Then remove from the heat and add sweet potato pieces to the pot along with 2 cups Three Trees almond milk. Blend using a food processor, immersion or standard blender until smooth.

Taste and add a touch more salt if it needs. Also add 2 Tbsp nutritional yeast, 4 Tbsps white wine or apple cider vinegar and 2 tsp chipotle Cholula. Once all blended, place back in the pot and bring to a simmer, mixing frequently so you don’t burn the dip on the bottom of the pan. Once it’s bubbling, add a slurry to the pot to thicken - 1.5 tsps corn starch with 2 tsps water. The heat will activate the starch, thickening the dip, so continue to cook and mix for a minute or two after adding.

Remove from the heat and let cool a few minutes. Top with plenty of fresh cilantro, juice of half a lime, and all of the caramelized onions. You can even add another splash Cholula if you like. Live your best dip life!

Low & Slow Goat Cheese Eggs

I’m not sure what’s worse than dry scrambled eggs.

I make very few exceptions in regards to my distaste for scrambled eggs and largely because they are often overcooked, becoming rubbery chunks I simply do not find appealing. Two notable exceptions however are 1) Australian Folded Eggs, gifted to my consciousness via The Kitchn and 2) Bobby Flay’s eggs at his now closed New York restaurant, Gato. Although these two dishes are made using differing techniques, what they share is the resulting soft, custardy deliciousness that can be scrambled eggs, when cooked the right way.

Borrowing from Gato’s addition of creme fraiche, goat cheese is mixed into these eggs before they’ve started to cook, and going slow allows you to make sure the eggs come off the heat just when they’ve transformed from raw to deliciously custardy.

 
AM2A6391.jpg
 

Low & Slow Goat Cheese Eggs

  • 4 eggs

  • 1.5- 2 Tbsps Soft Goat Cheese, preferably from a log and not precrumbled

  • Freshly ground black pepper

  • Butter or Extra virgin olive oil

  • Sea Salt

  • OPTIONAL: sprinkle eggs with your favorite finishers, I like chives and aleppo pepper

Take goat cheese out to bring to room temp.

Whisk 4 eggs together with a few cranks of freshly ground pepper and about ¼ tsp of sea salt.

Over low heat - start a non stick pan with a little pat of butter, or olive oil.

Once butter has melted or oil is warm, add eggs. The pan shouldn’t be so hot that the eggs start cooking when they hit the pan. Add about 1.5-2 Tsps softened, crumbled goat cheese.

With a spatula, start gently mixing the eggs in the pan. The idea is to create folds of softly cooked egg. Continue folding in a circular manner until the eggs are gently cooked with creamy layers in between. Put into a bowl and top with fresh chives and any of your other favorite toppings.

Goat Cheese & Honey Breakfast Toast

One of my all time favorite breakfasts.

If you follow me over on my Instagram, you see me eat this constantly, in a million different ways. The ingredients you can’t do without out? The goat cheese & the honey.

 
Micole Rondinone Avocado Toast
 

Goat Cheese & Honey Breakfast Toast

  • 2 whole eggs

  • 2 slices of good bread, I like a great sourdough

  • 1 - 1.5 Tbsps Goat cheese

  • 1 ripe avocado

  • Maldon salt or kosher salt

  • Freshly ground black pepper

  • Aleppo pepper or red chili flakes

  • Extra virgin olive oil

Take out your goat cheese to give it time to soften at room temperature. Toast the bread in a toaster or in a hot pan with a little bit of cooking fat, flipping after the first side is golden. In a non-stick pan, add olive oil and allow to get hot, waiting until it shimmers.

In the meantime, crack eggs carefully into a bowl, making sure no pieces of shell have fallen in. When your pan is hot add the eggs, being careful not to break the yolks. Sprinkle with a little sea salt and black pepper.

Spread your goat cheese on the warm toast and then place half of a sliced avocado down on each piece of bread.

When the white of your eggs has cooked through almost completely and isn’t looking wobbly, flip the eggs carefully, allowing it cook for just a moment more, and then immediately remove from the heat and place on your toast. If you like a more well done yolk, give it an extra minute over the heat.

Drizzle with honey and sprinkle with my favorite, aleppo pepper, or red chili flakes, and a bit of Maldon salt (kosher salt works here too). Eat promptly while warm and delicious.

End of Summer Nachos

Crispy, creamy, and spicy...

What’s not to love about eating nachos?  By their very nature they allow for a layering of intense flavor that excites the palette, and this version does not disappoint.  Each bite combines sharp, gooey jack and cheddar cheeses, pico de gallo made with stunning heirloom tomatoes, the sweetest grilled summer corn, spicy chicken, pickled onions and creamy avocado poblano salsa.  And the best part about making your nachos at home is that you can be sure to layer the chips and toppings evenly to avoid the dreaded empty-chip bottom.  In my opinion there is no better way to celebrate the end of summer than outside with friends, sharing a plate of nachos and perhaps toasting with a watermelon margarita.

While the below recipe does outline a bit of advance prep work, you can also choose to skip those additional steps and save time by buying pre-made ingredients instead (no shame in that game!).  I opted to make my own chips (which are surprisingly easy), pico de gallo, crema, and pickled onions, all of which are outlined in the recipe below.  This dish can either be a fun afternoon of cooking and D.I.Y-ing it all, or more of a quick throw-together.  Choose your own adventure!

Micole Rondinone End of Summer Nachos

Making these nachos before the summer tomatoes and corn are gone from the farmer’s market makes this dish extra special, but of course they can be modified for any time of the year.  Off-season tomatoes aren’t the same but they’ll do, and good quality frozen corn charred in a cast iron pan is fine.  And for my fellow New Yorkers who do not have the luxury of a backyard or a grill, use a Lodge Cast Iron grill pan to make the best grilled food year round.

The other thing I love about nachos is that they are fully customizable: is your vegetarian cousin coming to the party?  Make grilled portobellos in place of chicken.  Want to make sure your vegan friend can partake?  Sub in your favorite dairy-free cheese alternatives and swap sour cream for a dollop of Kite Hill spread

And speaking of dairy free, the avocado poblano salsa these nachos are served with is vegan friendly and worth the extra 10 minutes it takes to whip up.  Even if you opt for store-bought chips, pico and sour cream, this salsa is not to be missed.  Put a scoop on top and serve the extra on the side for dipping.  It's seriously addictive. I won't tell if you eat the whole bowl yourself, I promise.

Micole Rondinone End of Summer Nachos

End of Summer Nachos

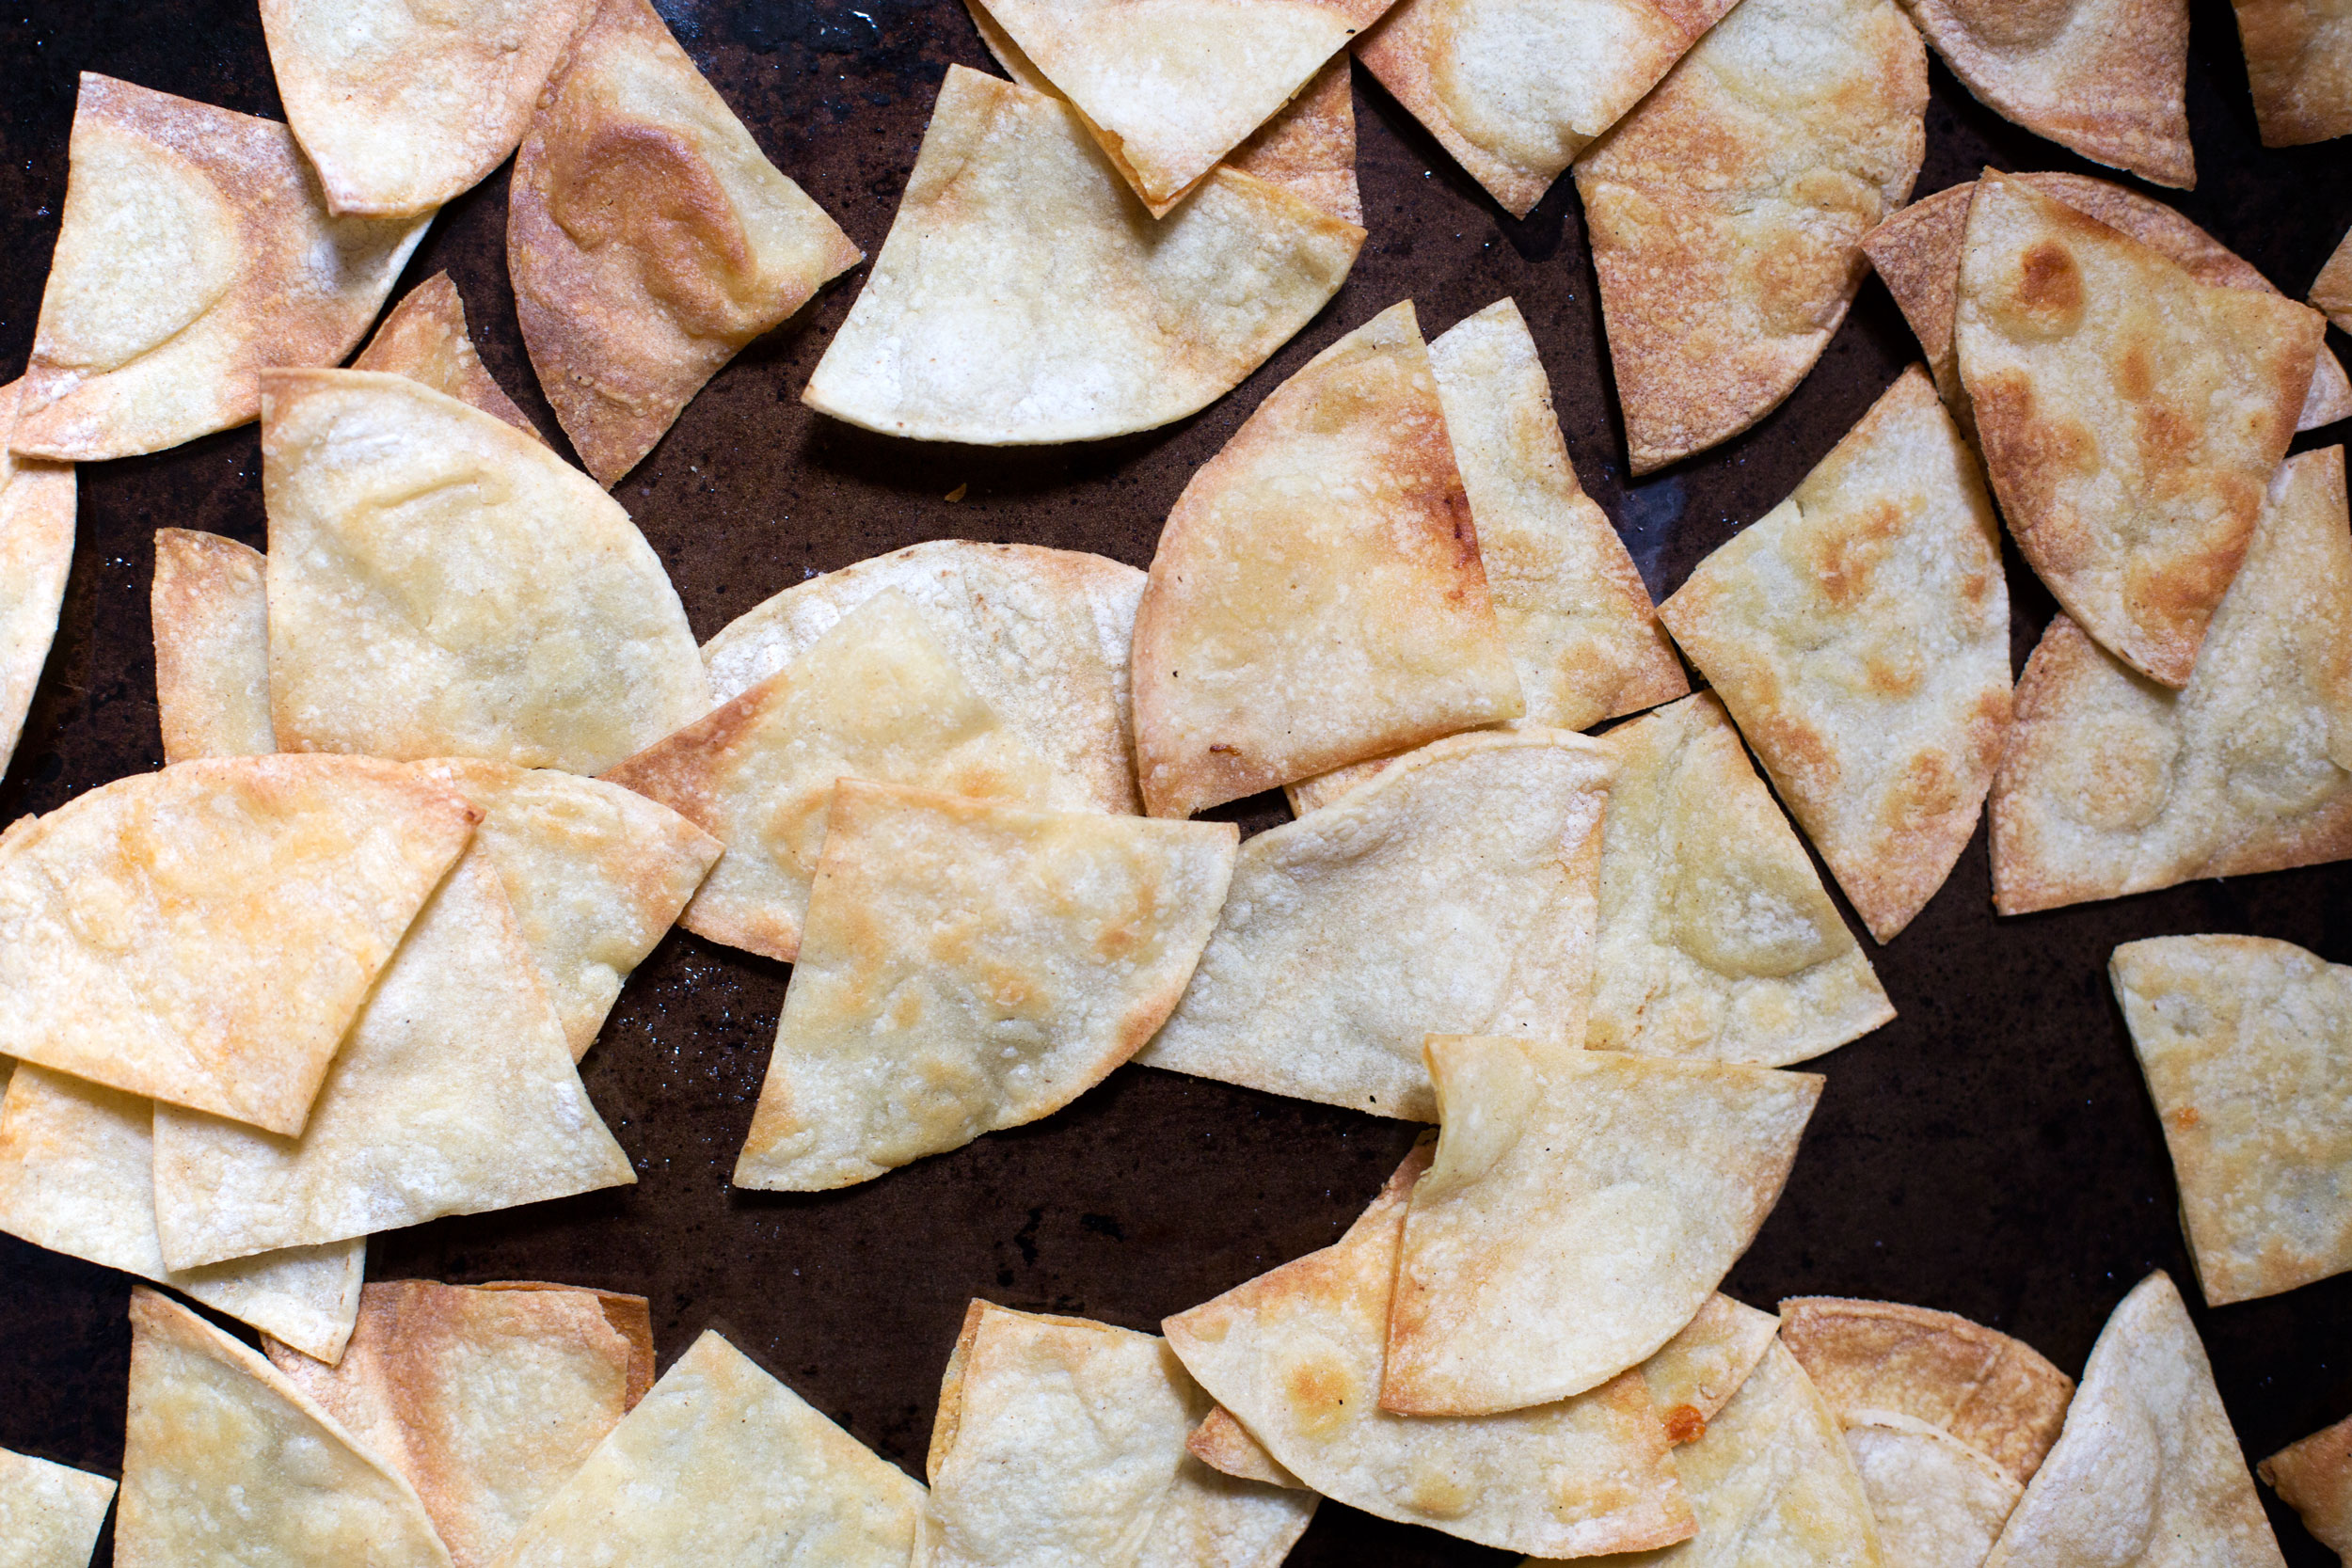
  • 18 small corn tortillas (or 1 large bag of corn tortilla chips if you aren't making chips - I like Xochitl brand)

  • 1 lb. boneless skinless chicken breast, or 2/3 large portobello mushrooms for vegetarian/vegan

  • 1 block sharp yellow cheddar cheese (for vegan, replace with Daiya or Siete Foods)

  • 1 block pepper jack cheese (for vegan, see above)

  • 2 fresh corn cobs (ideally when in season)

  • 2 jalapeños (or 1 jalapeño if you aren't making pico de gallo or pickled onions)

  • 2 medium heirloom tomatoes to make your own pico de gallo (or 1 container pre-made pico de gallo)

  • 6 limes (or 4 limes if you aren't making pico de gallo and chips)

  • 1 bunch fresh cilantro

  • 1 poblano pepper

  • 1 long red pepper

  • 1 ripe avocado

  • 1 medium red onion (2 if you are making pickled onions)

  • 8 oz. container Sour Cream (for vegan, use Kite Hill spread)

  • 1 can black beans (I prefer Brad's Organic but any will do)

  • Extra Virgin Olive Oil

  • Sea Salt

  • Cayenne powder

  • Garlic powder

  • Smoked Paprika

  • Adobo Seasoning

  • Chili Powder

  • OPTIONAL: Cotija or queso fresco for shaving on finished nachos, red radishes, and any other nacho toppings you love

** If you are feeling ambitious, make the home-made versions of the chips, crema, pickled onions and heirloom pico de gallo in advance.  Recipes for all four are at the bottom of the page, and should be prepared in advance of the following steps.  If you are short on time, buy them pre-made and start here: 

First thing to do is make the poblano salsa.  If you are grilling, you can put your poblano on the grill and allow the pepper to blister evenly all over.  If not, use your oven and put it on a high broil setting.  Place the clean poblano pepper on a baking sheet on the top shelf.  You will need to monitor the pepper, leaving it up to 8 minutes or until it starts to blister and the skin starts to char.  Then turn to the other side, and again watch for blistering, 5-8 minutes.  Once the pepper is blistered evenly on all sides, remove from the oven. 

Do not touch the pepper as there will be very hot steam underneath the blistered skin, so remove carefully.  Set aside and let cool to room temperature.  Once cool to the touch, cut off the top, cut down one side lengthwise and remove the seeds inside.  Place the entire pepper into the bowl of your food processor.  Then add juice of 1 whole lime, 1 avocado, ¼ tsp salt, ½ jalapeno, and 3 tbsps olive oil and run the food processor until all ingredients are broken down and the consistency is creamy.  Adjust salt to taste.  Put in a small jar with a tight top and put in the fridge.

Next shred roughly 1 cup of cheddar and 1 cup of pepper jack cheese and combine in one bowl.  Stick in the fridge to use later.  If you like your nachos extra cheesy, you should shred extra.  To make these nachos vegan, you can add your favorite melty vegan cheese alternative (I personally prefer Daiya, but Whole Foods carries other alternatives like Chao, or "queso" sauce alternatives like Heidi Ho and Siete Foods).  Dollop Kite Hill's vegan chive spread on top when serving. 

Next let's grill our chicken and corn.  Remove husks from corn and rinse.  In a small dish, pour out a little olive oil and using a pastry brush, brush olive oil all over the corn.  If you don't have a pastry brush, you can use your hands.  Squeeze juice of 1/2 a lime over the corn and sprinkle with sea salt.  Put on the grill, turning until slightly charred on all sides.  Then set aside.  If you do not have access to a grill, use my favorite Lodge Cast Iron grill.

Marinate your chicken breasts in a large bowl with 2 tbsps EVOO, juice of ½ lime, ⅛ tsp cayenne, ¼ tsp garlic powder, ¼ tsp smoked paprika, ½ tsp adobo seasoning, ¾ tsp chili powder, and ½ tsp sea salt.  Mix until breasts are covered equally all over with the spice mix.  Let marinade for 30 minutes if you have the time, or throw right on the grill, cooking approximately 8 minutes on the first side, then flipping and allowing the chicken to cook another 8 minutes, or until chicken is completely cooked through and no longer pink inside.  If you have a meat thermometer, chicken should have an internal temperature of 165 degrees fahrenheit.  Once chicken is done, set aside to rest. 

Want to make this dish vegetarian?  Try marinating and grilling portobello mushrooms the same way, letting them marinate a bit longer to soak up all the flavor. 

Next add a can of black beans to a pan along with some of the juice from the can so that the beans stay moist.  Add sea salt to taste, a sprinkle of garlic powder and juice of half a lime.  Let the beans cook on medium-low heat, using the back side of a large spoon to crush the beans a little bit.  Once the flavors have all combined, about 8-10 minutes, turn the heat off and set aside.

Let's cut our corn off the cob.  Stand one of your grilled cobs upright in a bowl and carefully use a sharp knife to cut down the cob lengthwise, shaving the kernels off.  Do this to both cobs and set aside.

Now it's time to put everything together! 

Before you start building the nachos, preheat your oven to 350 degrees.

If you made the homemade chips in advance (recipe below), grab those now.  If you opted for store bought, no worries.  Lay your chips out in a single layer in a medium pyrex dish (2.2 qt or 3 qt will do).  You can also use a baking dish but preferably something with sides so you can get layers going.  

Evenly sprinkle some of your mix of shredded cheeses, then some of the grilled corn and cooked down beans.  Then you'll lay down a second layer of chips, and do the same.  Finally, add a third layer of chips, cheese, beans, and corn as well as your grilled chicken (or portobellos for vegetarian).  Add a little more cheese on top of everything.

Stick in the oven at 350 for 15-20 minutes.  Nachos should be crispy and golden brown on top. 

Once done, carefully pull out of the oven and get to topping!

Drizzle citrus crema (recipe below), or top with sour cream for a shortcut.  Sprinkle with pickled onions and peppers (recipe below).  Finally, finish with a nice big scoop of pico de gallo (recipe below) and that incredible avocado poblano salsa.  Add some more fresh cilantro, and sliced radish if you like it.  Serve with all the extra toppings on the side so people can dip as they please, and most of all, enjoy every last crunchy bite!

AM2A1480.jpg

HOMEMADE BAKED TORTILLA CHIPS

There’s nothing like homemade, crunchy baked tortilla chips.  It's actually insanely simple, and in my opinion, worth the end result.

Preheat your oven to 350.  Remove 18 corn tortillas from the bag, and 6 at a time, cut them down the middle into two halves, and then again into quarters.  Set all your quarters aside.

In a small dish, combine about 6 tbsps olive oil and juice of a small lime.  

Lay out 6 tortillas, or 24 quarters, onto a baking sheet in a single layer.  Depending on the size of your oven, lay 6 more tortillas out on a second and third baking sheet, or do this in batches.

Using a pastry brush, brush a little of the olive oil mixture onto each of the tortilla pieces.  Then flip and do the same on the other side of each piece.  Sprinkle the entire tray with sea salt.

Put the baking sheet into the oven and bake for 8-10 mins on the first side, checking along the way as all ovens are different, that the bottom side is golden brown.  Then flip and do another 5-10 mins on the second side until golden and crunchy.

If you are doing this in batches, repeat until all tortillas are done.  Combine in one bowl and toss with a little more sea salt if they need it.  I recommend making these the day of.

AM2A1454_rotated.jpg

HEIRLOOM PICO DE GALLO

To prep the pico de gallo, using a serrated knife, dice half of a medium sized green heirloom tomato and half of a medium red heirloom tomato and add to a mixing bowl.  Cut off 3 rounds of red onion, dice into small pieces and combine in the bowl with the tomato.  Dice half a jalapeño into small pieces and fold in with the other ingredients (without seeds if you want less heat).  Add lime juice and sea salt to taste.  Cut off some clean cilantro leaves from the bunch and finely chop.  Add to the salsa, mix and adjust seasoning as needed. This should render about 1 cup of pico de gallo but use the entire tomatoes to make more, adding more of the other ingredients as well.  This is all to taste, so add more of anything you like. Trust your culinary intuition! Keeps in the fridge 2-3 days.

PICKLED ONIONS

To pickle the onions, cut one whole red onion into thin rounds and then chop rounds into halves.  Use the other half of the jalapeño and cut into rounds (without seeds for less heat). Add jalapeño and onions to a clean 8 oz jar. In a bowl, mix 1/2 cup apple cider vinegar, 1 tablespoon sugar and 1 1/2 teaspoons kosher salt and mix until the salt and sugar have dissolved.  Then pour the mixture into the jar so that they fully submerge the onion and jalapeño. Cover and let sit at room temperature for up to an hour.  Then store in the fridge.  You can make this up to 1 week in advance. 

CITRUS CREMA

To make your own citrus crema, to a bowl add 5 Tbsps of sour cream, juice of ½ a lime and a sprinkle of sea salt and whisk.  Keep in the fridge until ready to use.  Make this the day of.

Crispy Roasted Garlic & Za’atar Fries w. Black Peppercorn Honey

The holy grail of fry texture is…

Icrispy on the outside, soft on the inside. Usually acquired through frying (specifically double frying), but achieved here by cranking your oven to 425º. Use neutral oil that can withstand high heat and you’re good to go. It’s also a perfect chance to put your knife skills to the test - the more uniformly you cut your potatoes, the more uniformly your fries will cook. If you have a mandolin, use that to help you along. Most importantly though, have fun and go heavy on the seasoning: salty, sweet, garlicky & herbaceous.

AM2A0880.jpg

Crispy Roasted Garlic & Za’atar Fries with Black Pepper Honey

  • 2 Idaho or russet potatoes, cut into ¼ inch matchsticks, approx 1.5 - 2 lbs

  • 2 Tbsp neutral oil

  • 1.5 tsp salt

  • Freshly ground black pepper, to taste

  • ⅛-¼  tsp garlic powder, to taste

  • ⅛-¼ tsp smoked paprika, to taste

  • ½ tsp za’atar, or to taste

  • 1 Tbsp honey

  • 10 black peppercorns

Preheat the oven to 425.

Thoroughly scrub your potatoes. Fill a large bowl with cold water and juice of ½ a lemon if you have it on hand. This will help to stop the potatoes from oxidizing (getting brown). Cut your potatoes lengthwise instead of across, into ¼ in thick ovals, adding to the cold water as you go. Next, cut your ovals down into matchsticks, also ¼ in thick. Be as precise as you can here, as the fries will cook more evenly the more uniformly they’re cut. (QUICK TIP: I actually used a ruler to measure out one fry: I made sure it was ¼ in thick all the way around, and then I used that as the reference point for all the others. Having a visual will help you me maintain better uniformity while cutting the rest.)

Get out 2 half baking sheets, roughly 11”x16”, and line with parchment. These are my fav.

Once potatoes are all cut, take the matchsticks out of the water and place in a kitchen towel or paper towel. Dry them off as thoroughly as you can, and also dry the bowl that they were in. Place dry potatoes back into the dry bowl and toss with a neutral oil that has a high smoke point (best for high heat baking vs olive oil which will burn). Next add salt and lots of freshly ground black pepper and toss again.

Right away after seasoning lay the potatoes out on the baking sheets (the longer they sit, the salt will start to pull liquid from the potatoes and you want them as dry as possible for the crisp exterior). Lay the potatoes out in a single layer and don’t crowd the baking sheets. Drizzle with a little more neutral oil (just a little, no need to go crazy) and place in the oven.

Bake for 15 minutes, or until one side is crispy and golden. Then flip the fries and place back in the oven for another 15 minutes, or until all fries are crispy on the outside but soft in the middle. Depending on how hot your oven gets, you may not need to roast a full 30 minutes.

While the fries are in the oven, in a small ramekin add your honey and crushed whole black peppercorns. You can crush the peppercorns using the flat side of a chefs knife or a mortar and pestle. You can also turn your pepper grinder to coarse and add pepper that way: in that case, add just shy of ½ tsp coarse pepper. Mix to incorporate evenly.

When fries are finished cooking, carefully add them to a large bowl and while still hot toss with garlic powder, smoked paprika and one last pinch of coarse salt. Drizzle with black pepper honey and finally, finish with herbaceous za’atar! Enjoy immediately while warm!

Charred Sweet Potato Wedges w. Herb Salsa

Admittedly, I’m a sweet potato nerd.

I like sweet potato fries, sweet potato chips, sweet potato wedges, and charring them here and dressing them up with herb salsa is certainly not a bad way to eat your vegetables.

AM2A5388.jpg

Charred Sweet Potato Wedges with Herb Salsa

  • 1 large sweet potato, cut into wedges

  • Adobo seasoning (or garlic powder)

  • Smoked paprika (or paprika)

  • Cayenne powder

  • Extra Virgin Olive Oil

  • Sea Salt

  • Herb Salsa

  • OPTIONAL: Thick yogurt for serving

Some people like their sweet potatoes with no skin on, but the skin packs tons of nutrients so I choose to keep mine on. If you do too, just make sure to wash and scrub them thoroughly first. Cut your sweet potatoes lengthwise in half and then into 3 or 4 long wedges depending on the size of your sweet potatoes. If the wedges are very long, cut them in half.

Preheat your oven to 400 degrees. If you have parchment paper, line a baking sheet with it. In a bowl, coat wedges generously with olive oil, salt, adobo seasoning, cayenne and smoked paprika. Your wedges should be coated with enough oil so they’re a little bit shiny and the seasoning sticks, but not so they’re drenched in a pool of oil, so you can add a little at a time, tossing as you go. Use whichever of the spices you have: garlic seasoning works great in place of adobo seasoning, and any type of paprika will be just fine. If you don’t have paprika, use a little chili powder. Taste a little bit of the oil with seasoning to check if it’s to your liking. Salt to taste, as always.

Place the seasoned wedges on the baking sheet in a single layer and put in the oven. Keep the bowl you used to toss the sweet potato so you can brush any remaining seasoned oil on the warm wedges right before serving. After about 10-12 minutes, check to see if the side facing the pan is golden and crispy. If it is, flip all your pieces and roast another 10-12 minutes. You can continue doing this until you get the crispness you want on both sides. All ovens are a bit different so just keep an eye on them.

When they’re done, brush with the remaining seasoned oil and serve with plain thick yogurt, if you like, and top with this bright, Herb Salsa.

Crispy Aleppo Chickpeas

Spicy, crunchy chickpeas with a hint of citrus…

Speckled with the beautiful flavor and color of Aleppo pepper. I will summarize if you don’t feel like reading on: these chickpeas are always a good idea. They have become a weekly staple in my fridge because of their versatility. I eat them on their own. I eat them in salads. I eat them under a fried egg. I eat them in the morning or late at night. Lest this turn into an ode to chickpeas à la Green Eggs and Ham, let’s cut to the chase. You should make these chickpeas … soon.

AM2A2175.jpg

The key ingredient may require a little forethought: aleppo pepper. While this isn’t a spice most of us have lying around next to the salt and pepper, it absolutely should be. Hailing from Syria and Turkey, this beautifully hued pepper is, according to Healthyish, “…about half as hot as crushed red chile flakes…”. So, bring this dish to your next dinner party and it will easily accommodate both your friends who like heat and those who don’t. Plus it will sound impressive when you announce that it’s your new favorite spice.

I encourage you to be heavy handed on the Aleppo pepper and on the lemon. Let the chickpeas cook longer than you think, giving them ample time to get crispy. Make the dish even more savory by adding some chopped baby bella mushrooms and letting those cook down in the mix — a drizzle of yogurt on top and it’s all dressed to impress. Or make them simply like I did here for a perfect brunch, paired with garlicky kale and a fried egg.

AM2A2079.jpg

Crispy Aleppo Chickpeas

  • 1 can of chickpeas

  • 1 medium lemon

  • 3 garlic cloves

  • Extra virgin olive oil

  • Aleppo pepper

  • Sea salt

  • OPTIONAL: Kale, eggs, garlic, baby Bella mushrooms, yogurt for drizzling, wildbrine Kimchi Sriracha (available at most Whole Foods)

First make the spicy chickpeas. You can make these in advance and use them for up to a week in salads, with eggs or as a side to any breakfast, lunch or dinner. Reheat them in a pan and serve crispy and warm.

In an 11’ frying pan, heat 2 Tbsps of olive oil over medium heat. Thoroughly rinse your chickpeas in a strainer of all the liquid from the can. Pat dry with a kitchen towel or paper towels. Add clean, dry chickpeas to the pan, patting them down into a single layer. After 2-3 minutes, add ½ tsp of sea salt,1 heaping tsp of aleppo pepper and 2-3 finely chopped garlic cloves. Mix frequently to make sure nothing is burning and to scrape crispy aleppo pepper and garlic from the bottom of the pan. Pat chickpeas back down into a single layer. If your garlic or spices are starting to burn, turn the heat down a little. Cook another 5 or so minutes, until golden.

If you want to add chopped mushrooms, add them now, allowing them to become tender and then adjusting seasoning as needed.

Remove pan from the heat and add juice of half a large lemon and mix, scraping the bottom of the pan.

Serve chickpeas warm on their own, topped with another good squeeze of lemon juice, and maybe a drizzle of yogurt.

For a perfect breakfast, move your cooked chickpeas to a bowl and cover to keep warm. Clean and use the same pan to cook up your garlicky kale and a fried egg.

Clean and cut kale: remove the tough stem by cutting the leaf away from the spine on each side with a sharp knife. Fold leaves and roughly chop.

In your clean pan, heat 1 Tbsp olive oil over medium heat until it starts to shimmer. Add at least 1 large handful chopped raw kale to the pan and let it begin to soften, about 2 minutes, stirring often to cook evenly. To the pan add 2 finely chopped garlic cloves. Cook a few minutes more until wilted, sprinkle with sea salt to taste, then remove from the heat and put on a plate. Again in the same pan, add a splash of olive oil and allow to get hot so you can fry your egg: add egg without breaking the yolk to the pan - it should sizzle a bit when you drop it in. You want the bottom to get crispy and the whites to set, while the yolk remains runny. Monitor the heat so it doesn’t cook too quickly, and use a cover to use the power of steam to set your whites if they’re taking a bit of time. Just keep an eye so you don’t cook your yolk. Gently remove the egg and place on top of greens. Spoon chickpeas onto the plate. Serve with condiments of your choice. I love pairing it with spicy, tangy wildbrine Kimchi Sriracha (available at most Whole Foods).